From Webpage
Chat Plugin
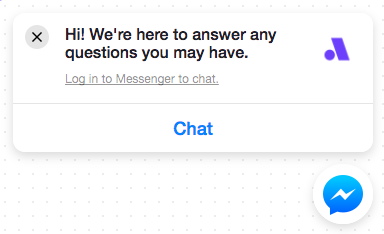
You can place customer chat plugin for Facebook Messenger to let users contact you directly from your web pages. When the user is logged in to Facebook, he can directly write to you. Otherwise the login popup is displayed.
The advantage is that all the recent history is displayed in the chat. Also you don't need to capture any personal information to follow up after the user leaves.

Setup
1. Setup Facebook JavaScript SDK
See documentation below.
2. Whitelist Origin Domain
Whitelist the domain where this plugin will be displayed.
Domain Whitelist Requirements
- This plugin has to be served over HTTPS.
- Use a fully qualified domain name, such as https://www.messenger.com/. IP addresses and localhost are not supported for whitelisting.
3. Render the Plugin
<div class="fb-customerchat"
 page_id="<PAGE_ID>">
</div>
| Attribute | Description |
|---|---|
| page_id | Id of your Facebook page. You can get this id in Amio app when you connect a channel with your Facebook page. |
4. Listen for Postback and Message Received Webhook
If a new conversation is started via the plugin, and you have set up the Get Started Button, you will receive a Postback Received webhook when the user clicks the get started button.
If the user sends you a message, you will receive Message Received webhook.
5. Customize the Plugin
You can set theme color, display behaviour, etc. using plugin attributes. See Facebook documentation for more detail.
Send to Messenger Button
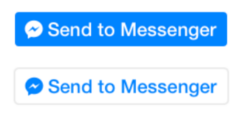
You can use this plugin to bind Facebook Messenger account with users in your application. This plugin places a button on your site. When the user clicks on it, it fires Opt-in webhook which you can listen to and get the user's id for further communication.

Setup
- Setup Facebook JavaScript SDK - see documentation below.
- Put the button plugin code to place where it should be displayed.
<div class="fb-send-to-messenger"
     messenger_app_id="{{FACEBOOK_APP_ID}}"
     page_id="{{PAGE_ID}}"
     data-ref="{{PASS_THROUGH_PARAM}}"
     color="blue"
     size="standard">
</div>
| Attribute | Description |
|---|---|
| messenger_app_id | Set your Facebook App id if you use custom facebook app. Set it to 1806054702946735 otherwise. It is the same value as the appId in Facebook Javascript SDK. |
| page_id | Id of your Facebook page. You can get this id in Amio app when you connect a channel with your Facebook page. |
| data-ref | Any arbitrary data you can send to Opt-in webhook. |
| color | blue or white, default value is blue. |
| size | standard, large or xlarge, default value is large. |
| cta_text | Choose text of the button. See Button Text for more details. |
data-refhas to use single quote if you send data using JSON. This ensures that the HTML is valid and button is displayed properly.
Button can be localized by setting locale of sdk.js, i.e.
js.src = "//connect.facebook.net/cs_CZ/sdk.js";. See Facebook documentation for more details.
Button Text

Custom text with already logged in user.
You can change text of the button from pre-defined strings using cta_text attribute.
Moreover, when the cta_text attribute is used, most signed-in users will only have to click the plugin button itself to opt in, without having to re-confirm with the popup, and the Opt-in webhook will be delivered immediately.
The following values are supported:
| cta_text | Text in English |
|---|---|
null | Send to Messenger |
GET_THIS_IN_MESSENGER | Get this in Messenger |
RECEIVE_THIS_IN_MESSENGER | Receive this in Messenger |
SEND_THIS_TO_ME | Send this to me |
GET_CUSTOMER_ASSISTANCE | Get customer assistance |
GET_CUSTOMER_SERVICE | Get customer service |
GET_SUPPORT | Get support |
LET_US_CHAT | Let us chat |
SEND_ME_MESSAGES | Send me messages |
ALERT_ME_IN_MESSENGER | Alert me in Messenger |
SEND_ME_UPDATES | Send me updates |
MESSAGE_ME | Message me |
LET_ME_KNOW | Let me know |
KEEP_ME_UPDATED | Keep me updated |
TELL_ME_MORE | Tell me more |
SUBSCRIBE_IN_MESSENGER | Subscribe in Messenger |
SUBSCRIBE_TO_UPDATES | Subscribe to updates |
GET_MESSAGES | Get messages |
SUBSCRIBE | Subscribe |
GET_STARTED_IN_MESSENGER | Get started in Messenger |
LEARN_MORE_IN_MESSENGER | Learn more in Messenger |
GET_STARTED | Get started |
JavaScript Events
You can subscribe to JavaScript events using this code:
<script>
  FB.Event.subscribe('send_to_messenger', function(e) {
    // callback for events triggered by the plugin
  });
</script>
| Event Field | Type | Description |
|---|---|---|
| event | enum | Event name: rendered, clicked, not_you. |
| ref | string | Contains the value set on the data-ref param on the plugin. |
| is_after_optin | boolean | Indicates whether event happened after the confirmation pop-up was confirmed. |
| pluginID | undefined | This field is not used. |
Webhooks
This plugin triggers Opt-in webhook.
Checkbox
Checbox Plugin is another convenient way how to bind a Messenger user into your application. For example, you can place this checkbox on the final page of your e-shop order process to allow user receive shipping details into Messenger.
Similarly to Send to Messenger Button, it recognise if user is logged-in on Facebook and place user's name and profile picture underneath. Checkbox can be checked by default so that user doesn't have to check it actively.

This Facebook plugin is quite difficult to implement so we'll guide you through the whole process.
How it works
When a person is logged into Facebook, his session will be detected and his name and profile picture will be shown beneath the checkbox. This lets the user know which identity will be opted into communication with the business if they proceed. The user can change the identity by clicking on "Not you?" link.
When the user is not logged in, he will be asked to do so.
Setup
- Setup Facebook SDK for JavaScript
- Render the Plugin
- Whitelist Origin Domain
- Listen for Plugin Events
- Confirm Opt-in
- Listen for Opt-in webhook
- Send Message
- Get User's Response
1. Setup Facebook SDK for JavaScript
See documentation below.
2. Render the Plugin
<div class="fb-messenger-checkbox"
     messenger_app_id="{{FACEBOOK_APP_ID}}"
     origin="{{YOUR_PAGE_DOMAIN}}"
     page_id="{{PAGE_ID}}"
     prechecked="false"
     allow_login="true"
     user_ref="{{STRING_UNIQUE_FOR_EVERY_RENDER}}"
     size="small"></div>
| Attribute | Type | Description |
|---|---|---|
| messenger_app_id* | Number | Set your Facebook App id if you use custom facebook app. Set it to 1806054702946735 otherwise. It is the same value as the appId in Facebook Javascript SDK. |
| messenger_app_id* | Number | Facebook application id of Amio app. Do not change this value. |
| origin* | URL | Base domain of the URL where the plugin is loaded. |
| page_id* | Number | Id of your Facebook page. You can get this id in Amio app when you connect a channel with your Facebook page. |
| user_ref* | String | Value must be unique for every render! Generate this value and it will references a user in the Opt-in webhook. |
| prechecked | Boolean (default: true) | When plugin renders the checkbox will be checked. |
| allow_login | Boolean (default: true) | Enables people to login if no existing FB session is present. Also enables the 'Not You' option. |
| size | Enum (default: large) | Plugin size. The allowed values are small, medium, large, standard and xlarge. |
3. Whitelist Origin Domain
Whitelist the domain you've set in origin attribute (see Render the plugin above).
4. Listen for Plugin Events
FB.Event.subscribe('messenger_checkbox', function (event) {
        console.log('FacebookService - Event "messenger_checkbox"', event)
        const userRef = event.user_ref

        if (event.event === 'rendered') {
          console.log('FacebookService - Event "messenger_checkbox" - Plugin was rendered')
        } else if (event.event === 'checkbox') {
          const checkboxState = event.state
          console.log('Checkbox state: ' + checkboxState)
        } else if (event.event === 'not_you') {
          console.log('User clicked \'not you\'')
        } else if (event.event === 'hidden') {
          console.warn('Plugin was hidden. This usually means a problem in FB or integration... Did you whitelist your domain? When using a FB dev app is your FB account registered developer/tester/admin? Have generated a unique `user_ref` for this render? And maybe more...')
        }
 })
5. Confirm Opt-in
To actually trigger the Opt-in Webhook you have to send MessengerCheckboxUserConfirmation event. You don't have to check the state of the checkbox it will be automatically checked by Facebook.
<html>
<head>
    <script>
        function confirmOptIn() {
            FB.AppEvents.logEvent('MessengerCheckboxUserConfirmation', null, {
                app_id: '{{FACEBOOK_APP_ID}}',
                page_id: '{{PAGE_ID}}',
                ref: '{{PASS_THROUGH_PARAM}}',
                user_ref: '{{STRING_UNIQUE_FOR_EVERY_RENDER}}'
            })
        }
    </script>
</head>

<body>
<input type="button" onclick="confirmOptIn()" value="Confirm Opt-in"/>
</body>

</html>
| app_id* | Number | Set your Facebook App id if you use custom facebook app. Set it to 1806054702946735 otherwise. |
| page_id* | Number | Id of your Facebook page. You can get this id in Amio app when you connect a channel with your Facebook page. |
| ref | String | Set this attribute to any data you wish to receive in Opt-in webhook as data.opt_in.payload. |
| user_ref* | String | It is the value you generated for the checkbox plugin in previous steps. The user_ref attribute references a user in the Opt-in webhook. |
6. Listen for Opt-in Webhook
When an event from previous state is sent, you will receive the Opt-in webhook call. You can pair your user using data.contact.user_ref that will contain the generated string that you provided as user_ref in previous steps.
{
  "event": "opt_in",
  "timestamp": "2016-10-06T13:42:48Z",
  "data": {
    "channel": {
      "id": "{{CHANNEL_ID}}",
      "type": "facebook_messenger"
    },
    "contact": {
      "user_ref": "{{STRING_UNIQUE_FOR_EVERY_RENDER}}" // set on frontend
    },
    "opt_in": {
      "type": "checkbox",
      "payload": "{{PASS_THROUGH_PARAM}}"
    }
  }
}
7. Send Message
You can send message to user using the user_ref attribute.
{
  "contact": {
    "user_ref": "{{YOUR_CUSTOM_USER_REF}}"
  },
   "channel": {
    "id": "{{CHANNEL_ID}}"
  },
   "content": {
    "type": "text",
    "payload": "You just signed in to our FB Page!"
  }
}
Life Time of the
user_refAt the time of writing this tutorial, it seems that Facebook keeps the old
user_refs forever. However, there is no clue for how long they will keep them. Amio uses this attribute to send messages until the facebook contact id is received (see next chapter for more details).
8. Get User's Response
To finish the full procedure of opt-in, the user has to reply you back. If this happens, you will receive a Message Received and Amio gets facebook contact page scoped id (PSID) which is used for further communication.
{
  "event": "message_received",
  "timestamp": "2016-10-06T13:42:48Z",
  "data": {
    "id": "{{MESSAGE_ID}}",
    "channel": {
      "id": "{{CHANNEL_ID}}",
      "type": "facebook_messenger"
    },
    "contact": {
      "id": "{{CONTACT_ID}}",
      "user_ref": "{{STRING_UNIQUE_FOR_EVERY_RENDER}}",
    },
    "content": {
      "type": "text",
      "payload": "That's really nice that I can write you here. You guys rock!"
    }
  }
}
Troubleshooting
Sometimes checkbox plugin is not displayed at all and it is quite hard to investigate where is the cause of the problem. For this situation, we created a troubleshooting list which should help you implementing this feature.
Contact our support team [email protected] if you cannot make this plugin work.
user_refhas to be always unique. (Even for every single page refresh!)- Check if the domain you're displaying the checkbox in has been whitelisted. In case you call your form from a similar domain
https://your-domain.com/facebook/facebook.aspxthen whitelisthttps://your-domain.com/facebooktoo! - If the
allow_loginparameter is set to false, you will need to have a valid Facebook user session (i.e. not logged in as a page) otherwise the plugin will be hidden. - Is the
originattribute the same as the domain where you host the plugin? - Testing on localhost is not supported by Facebook right now. You can overcome this by using Ngrok however.
- Check that
appIdin Facebook Javascript SDK andmessenger_app_idin Checkbox - 2. Render the plugin has the same values.
Message Us Button
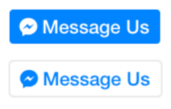
Message Us button can be used on your sites to let the users contact you on Facebook Messenger channel. On the desktop browser, the user is sent to messenger.com and on mobile they are sent to the Messenger native app.

Setup
- Setup Facebook JavaScript SDK - see documentation below.
- Put the button plugin code to place where it should be displayed.
<div class="fb-messengermessageus"
     messenger_app_id="1806054702946735"
     page_id="{{PAGE_ID}}"
     color="blue"
     size="standard">
</div>
| Atribute | Description |
|---|---|
| messenger_app_id | Set your Facebook App id if you use custom facebook app. Set it to 1806054702946735 otherwise. It is the same value as the appId in Facebook Javascript SDK. |
| page_id | Id of your Facebook page. You can get this id in Amio app when you connect a channel with your Facebook page. |
| color | blue or white, default value is blue. |
| size | standard, large or xlarge, default value is large. |
Webhooks
This plugin does not trigger a webhook callback. However, you will receive a Message Received webhook when the user sends a message to your page.
Messenger Link
You can use Messenger links to send them via SMS, email, or anywhere else to help someone find you more easily within Messenger. The link format is https://m.me/username.
You can use Messenger Link to:
- pair a FB Messenger user to a session or an account in an external app.
- to direct the user to specific content or features available within the bot.
A m.me link with an added parameter looks like this:
http://m.me/<PAGE_NAME>?ref=<REF_PARAM>
Facebook Page Username
Username of your Facebook Page can be set in administration, see Facebook instructions.
Facebook JavaScript SDK
To make Facebook plug-ins work, you have to include Facebook JavaScript SDK into your website. Place following code directly after the opening tag <body>. See Facebook Documentation for more details. Beware that some Javascript frameworks have their own libraries to include Facebook SDK.
<body>
  <script>
  window.fbAsyncInit = function() {
    FB.init({
      appId: "{{FACEBOOK_APP_ID}}",
      xfbml: true,
      version: "v2.11"
    });
  };

  (function(d, s, id){
    var js, fjs = d.getElementsByTagName(s)[0];
    if (d.getElementById(id)) { return; }
    js = d.createElement(s); js.id = id;
    // js.src = "//connect.facebook.net/en_US/sdk.js"; // whole SDK
    js.src = "//connect.facebook.net/en_US/sdk/xfbml.customerchat.js";
    fjs.parentNode.insertBefore(js, fjs);
  }(document, 'script', 'facebook-jssdk'));
  </script>
  ...
</body>
| Atribute | Description |
|---|---|
| appId | Set your Facebook App id if you use custom facebook app. Set it to 1806054702946735 otherwise. |
You can also use this great library - lazy-fb.
// npm install --save lazy-fb

lazyFB({
        appId: {{FACEBOOK_APP_ID}},
        autoLogAppEvents: true,
        xfbml: true,
        version: 'v2.11',
        sdkModule: 'xfbml.customerchat'
})
Localization
Button can be localized by setting locale of sdk.js, i.e.
js.src = "//connect.facebook.net/cs_CZ/sdk.js";. See Facebook documentation for more details.
Updated over 1 year ago
