Getting Started: Amio Web Chat
Amio Web Chat is a full-featured embeddable chat component that can be easily included in your website. Some parts of the chat's look & feel can be customized, like color theme or company logo, and we continue to provide more customization options according to our customers' requests.

Amio Web Chat embedded in a sample webpage
This short tutorial will guide you through the basic setup of Amio Web Chat.
We will start by creating a channel in Amio administration and adding the Web Chat to your website. Finally, we will show how messages are being exchanged between Amio API and the Web Chat.
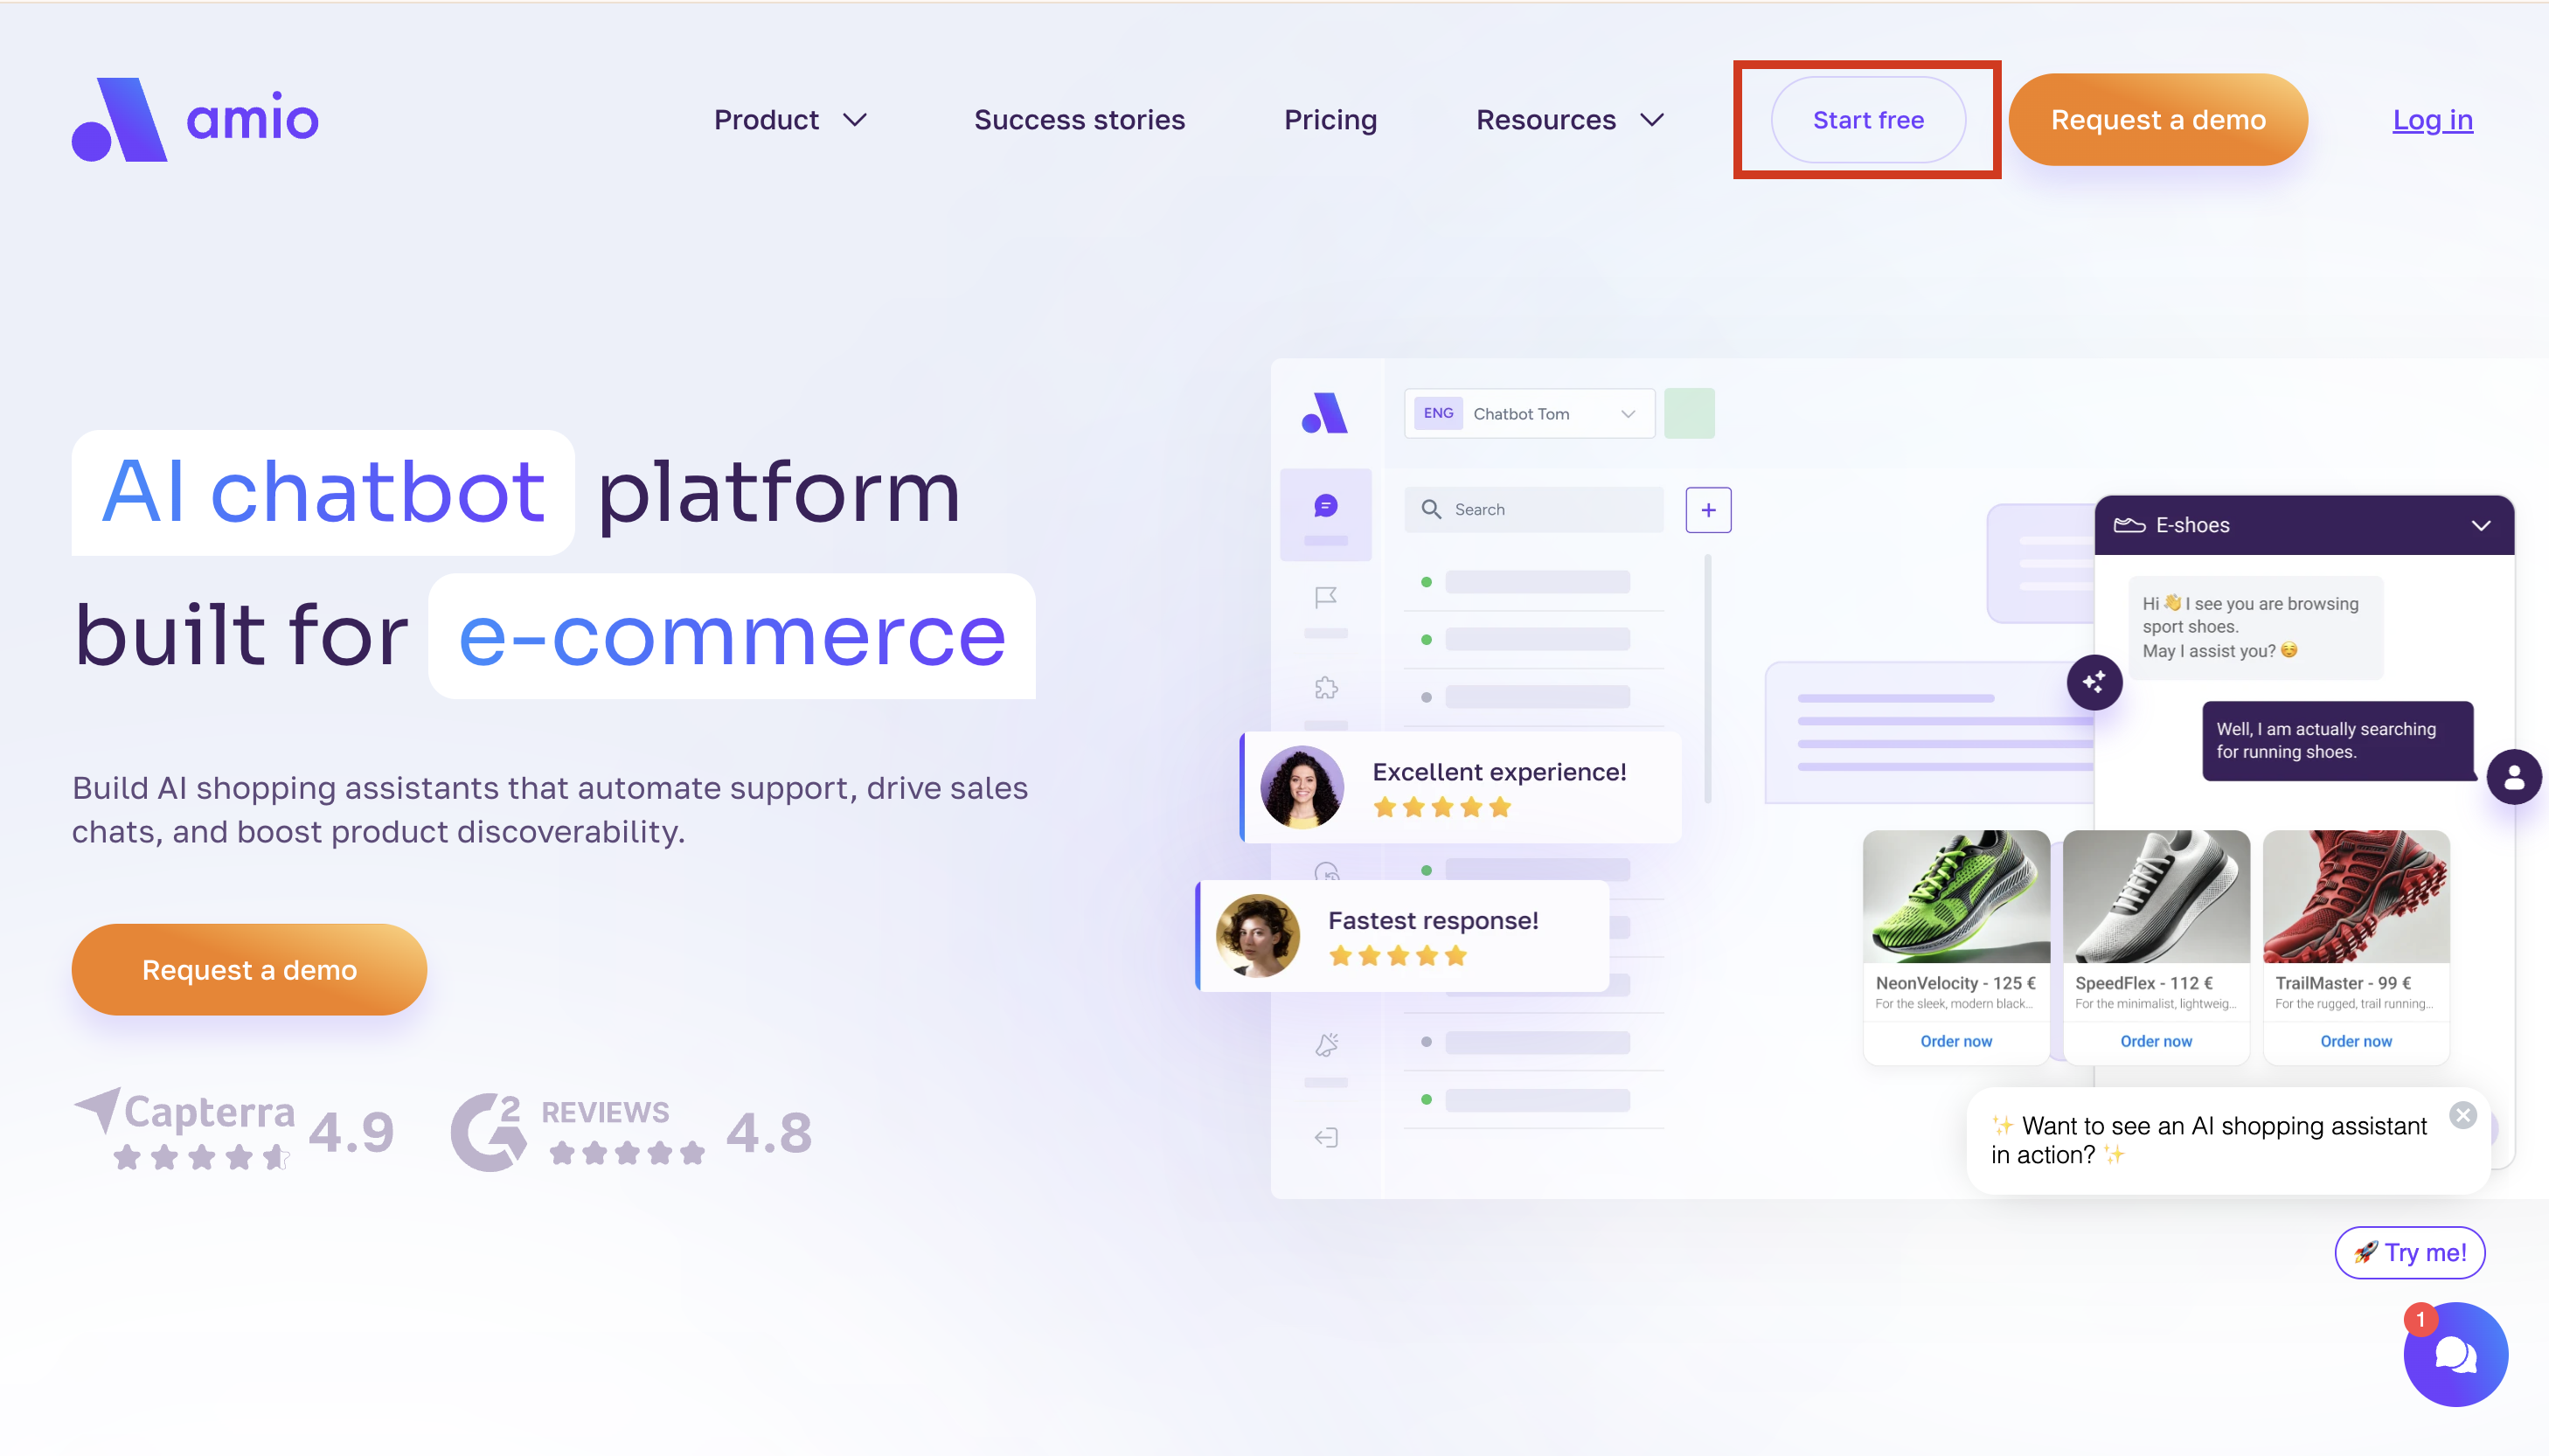
- First you go to Amio website and click "Start free" and Sign up for your new account

- Create a new chatbot by giving a Name, choose the GPT NLP Engine (easier to set up), Language, Timezone, Create from Template -> E-store (EN)
•If you are creating an Emailbot, choose -> E-store - Email bot (AI Intent Recognition)
•Click "Create"

-
After creating a new chatbot, go to "Answer" section
•Here you can turn answers on and off, depending if they are relevant for your eshop/website
•Or you can also add your own new answer
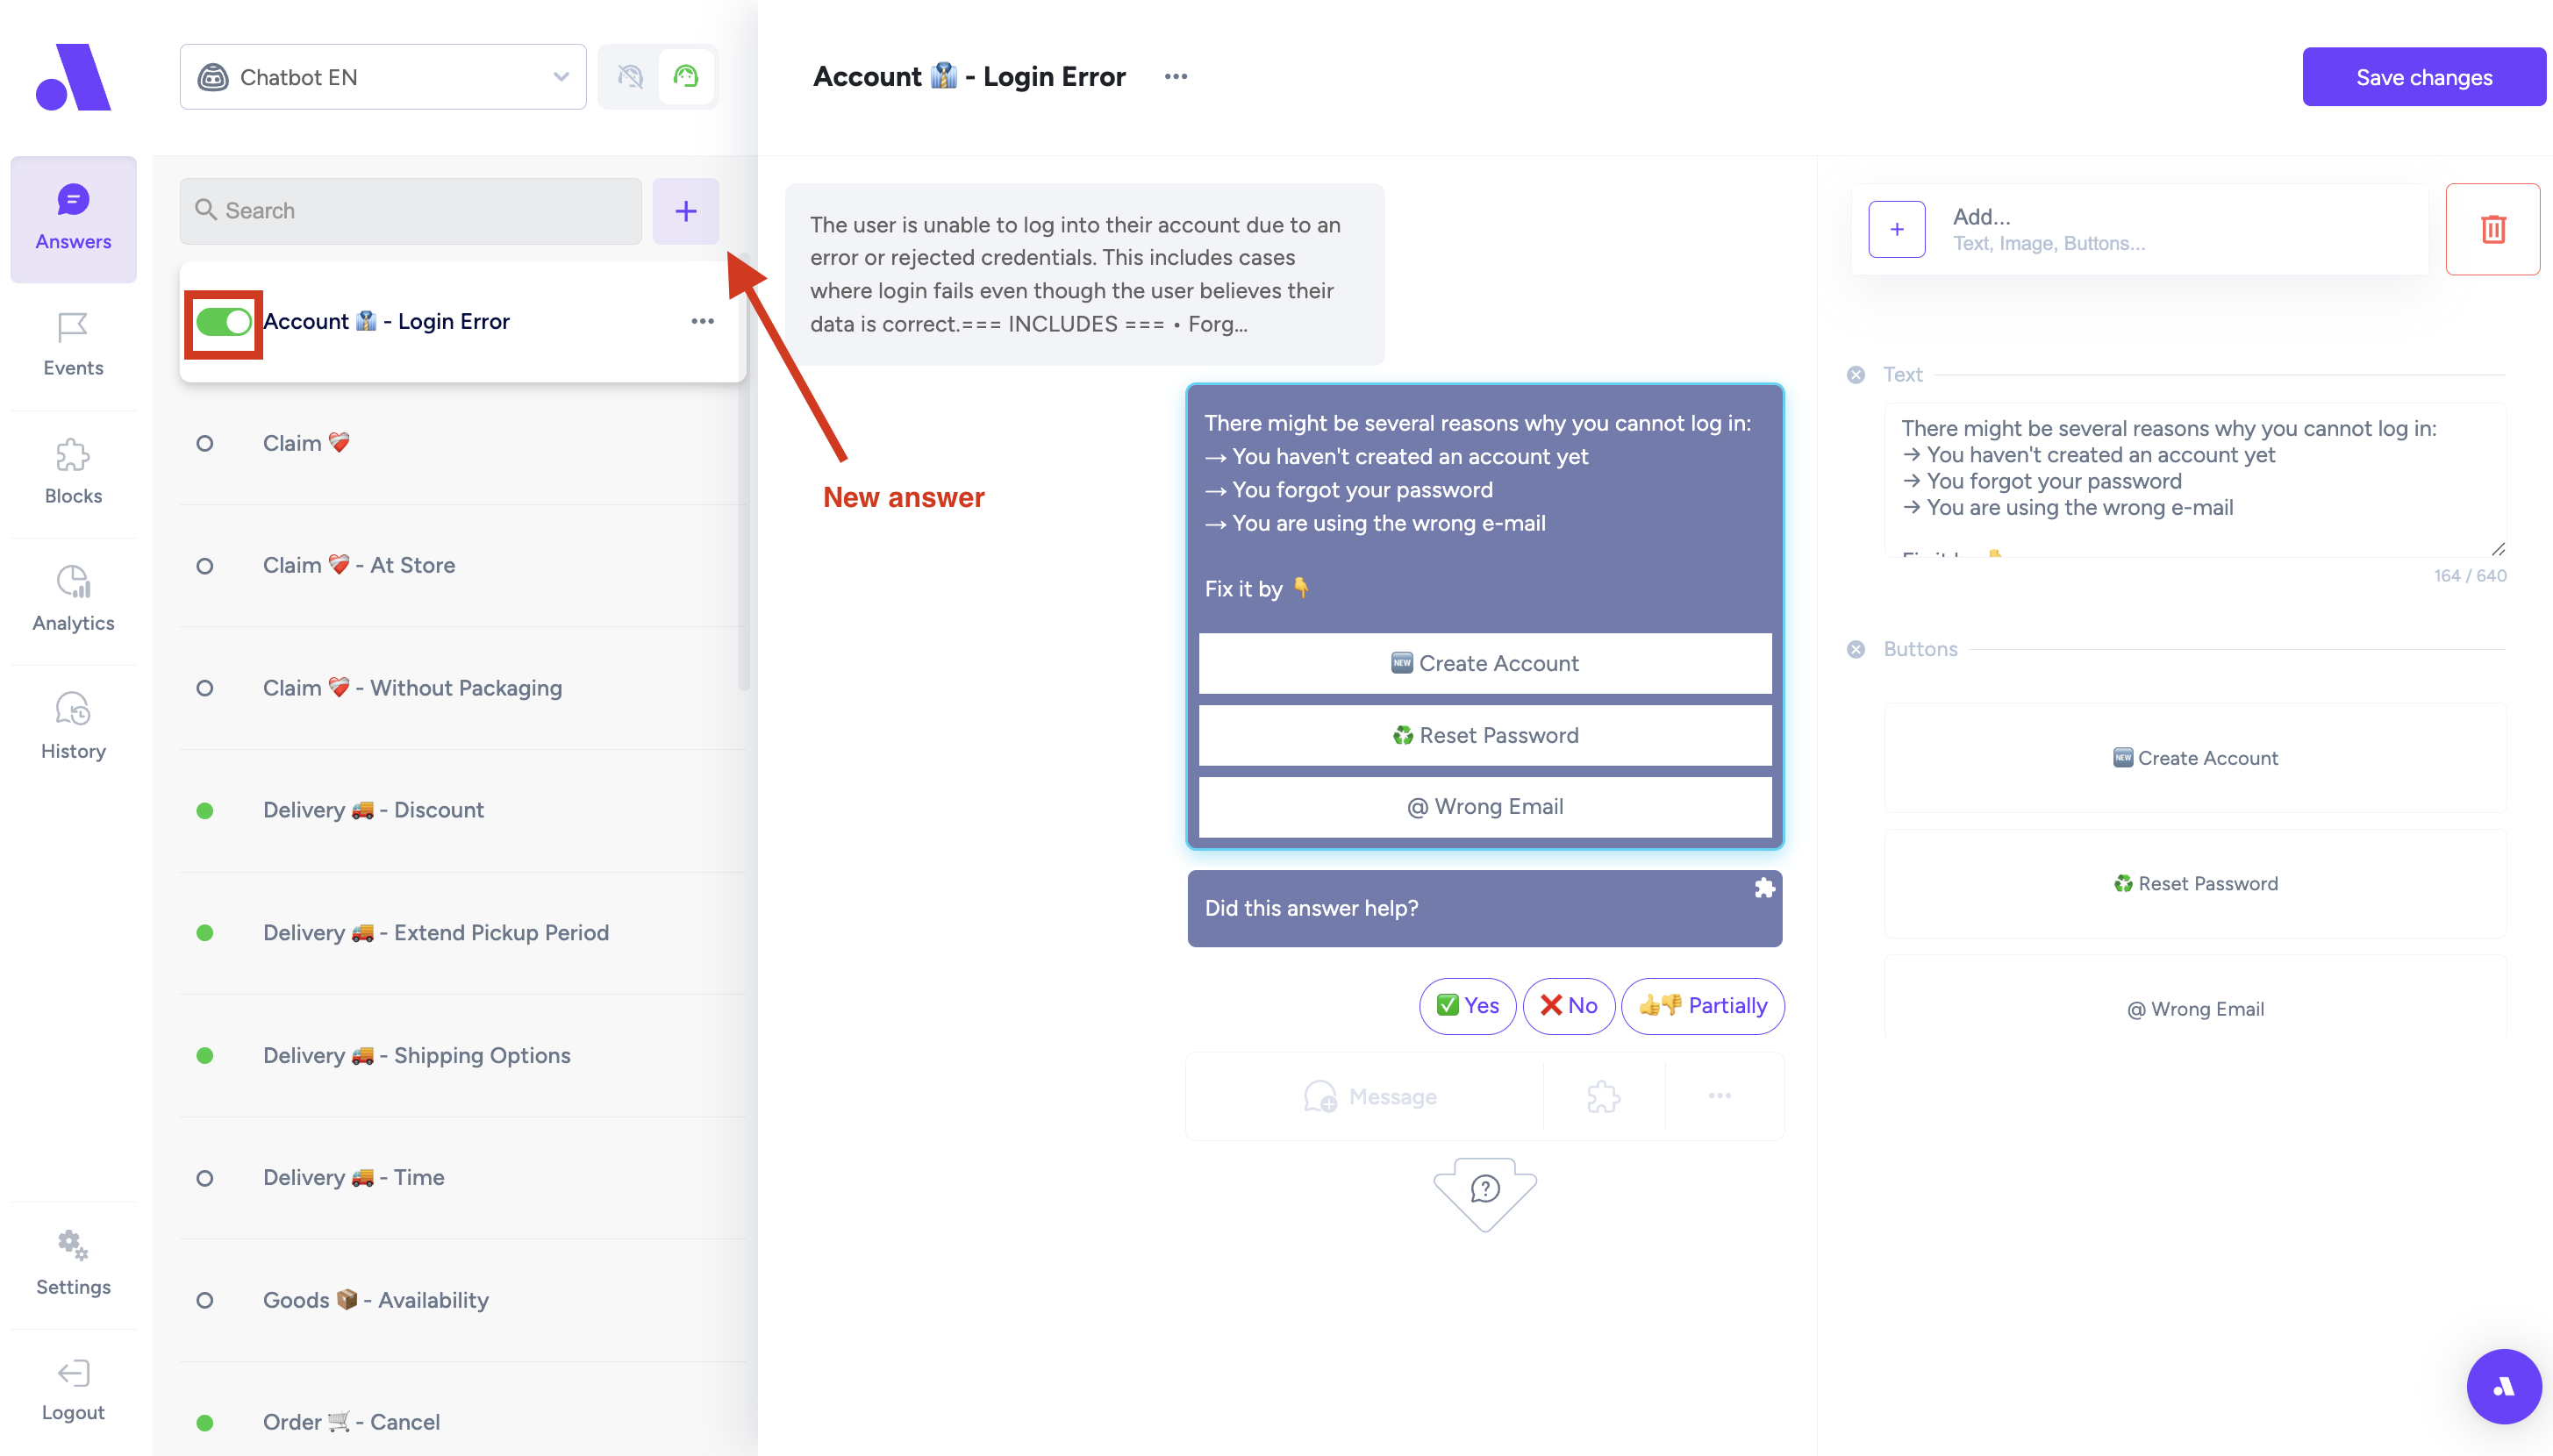
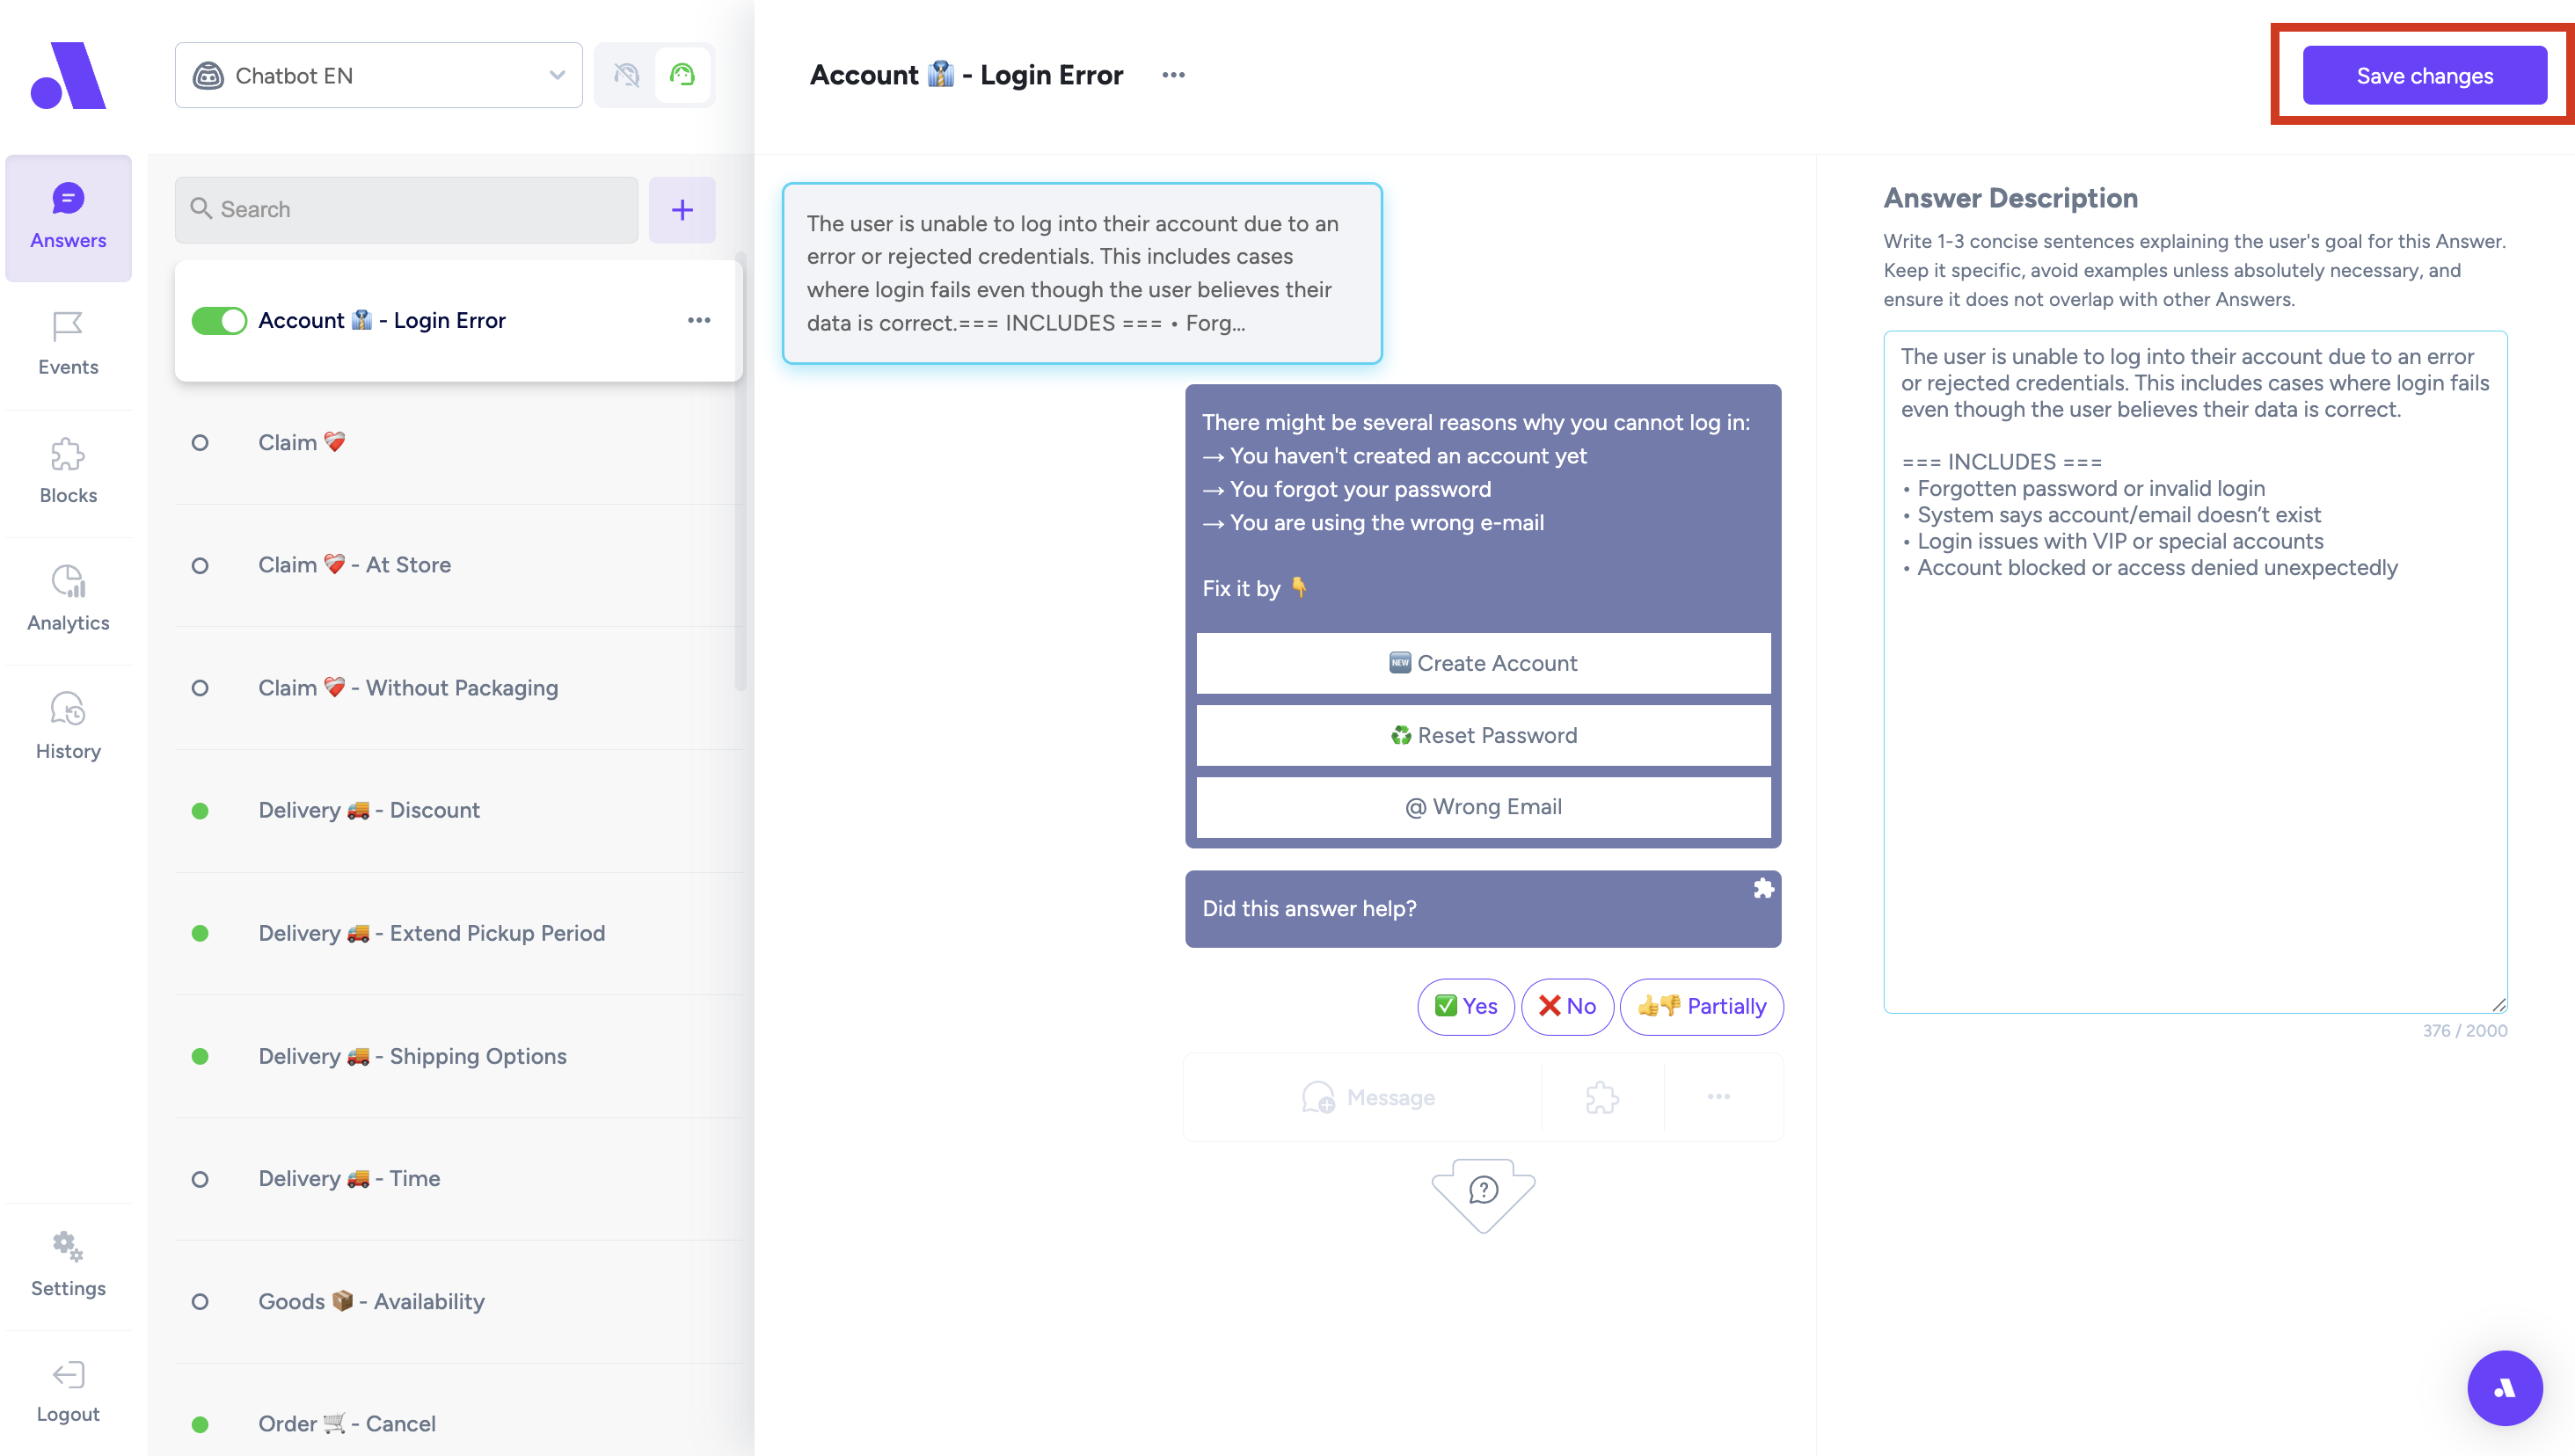
•On the left side you can see the grey message bubble which is an "Answer description" (descripiton of how the customers would ask about a specific topic: delivery, order status,..)
• After writing down/customizing your description you click "Save changes"
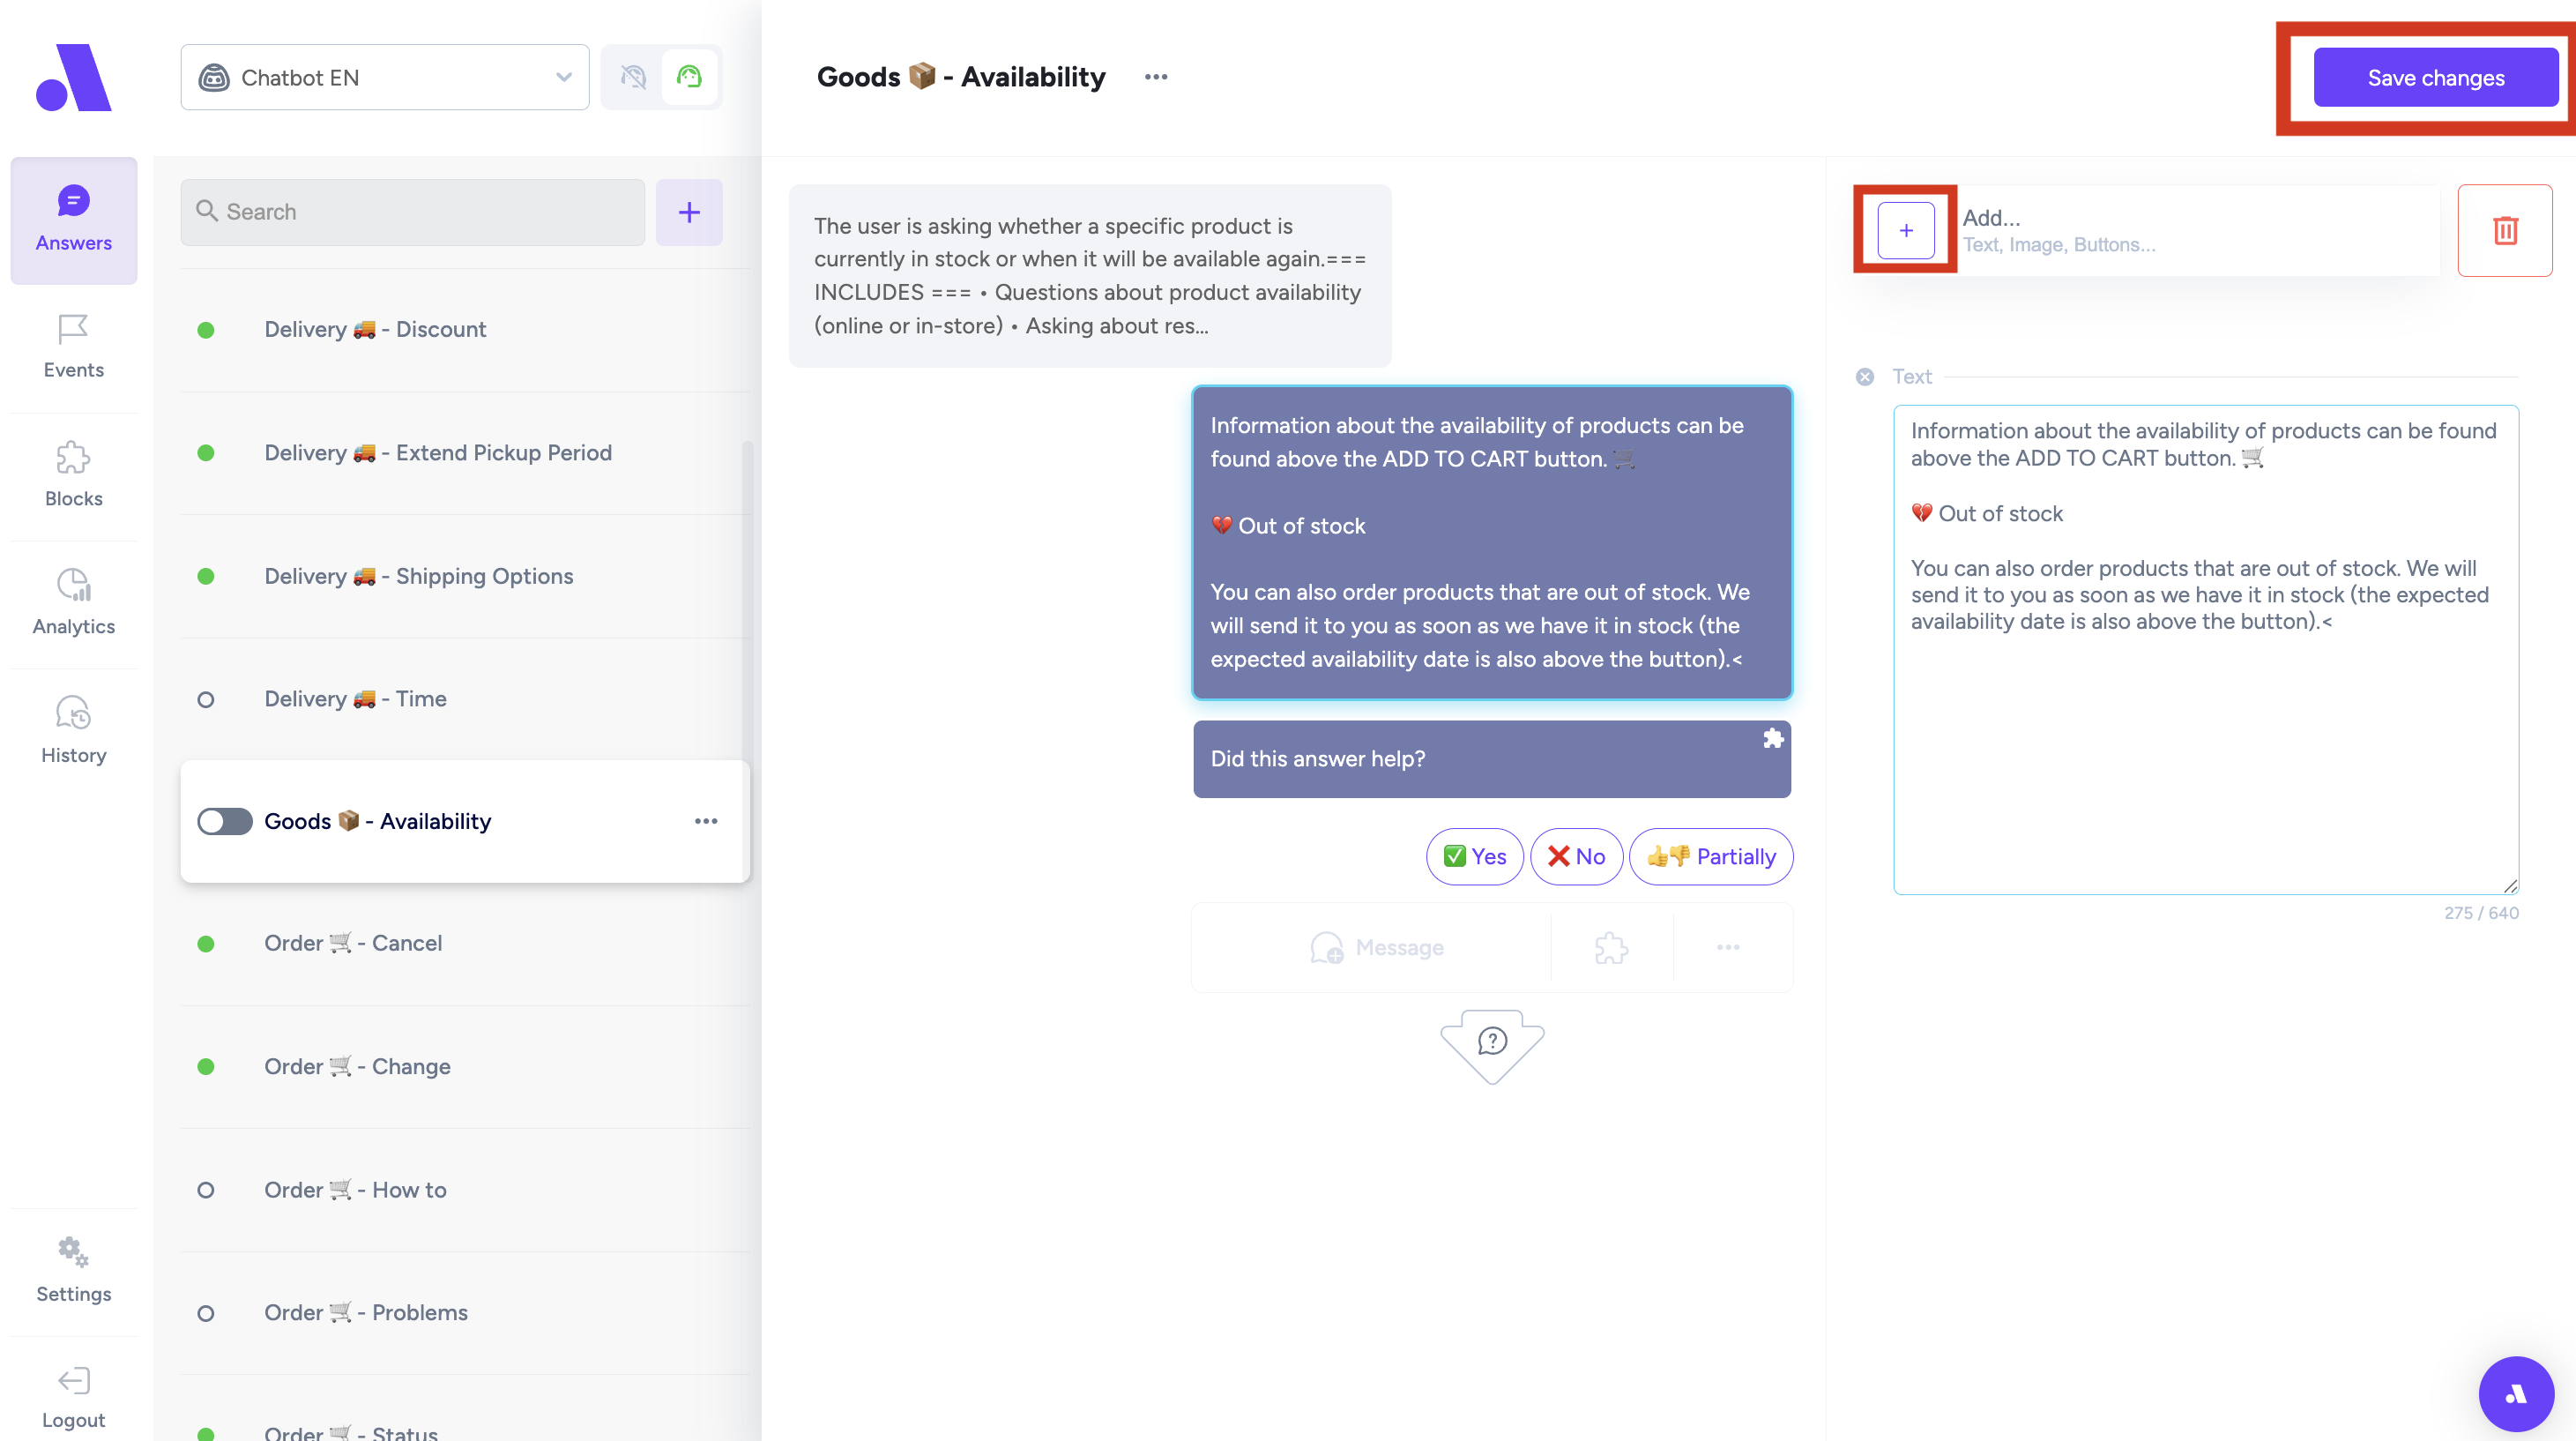
•On the right side you can see the purple message bubble which is the "Answear" (predefined answer of how the chatbot will answer to a customer about a specific topic: delivery, order status,..)
• You can even add Buttons to your answears by clicking "+Add" -> Button
• After writing down/customizing your description you click "Save changes"
-
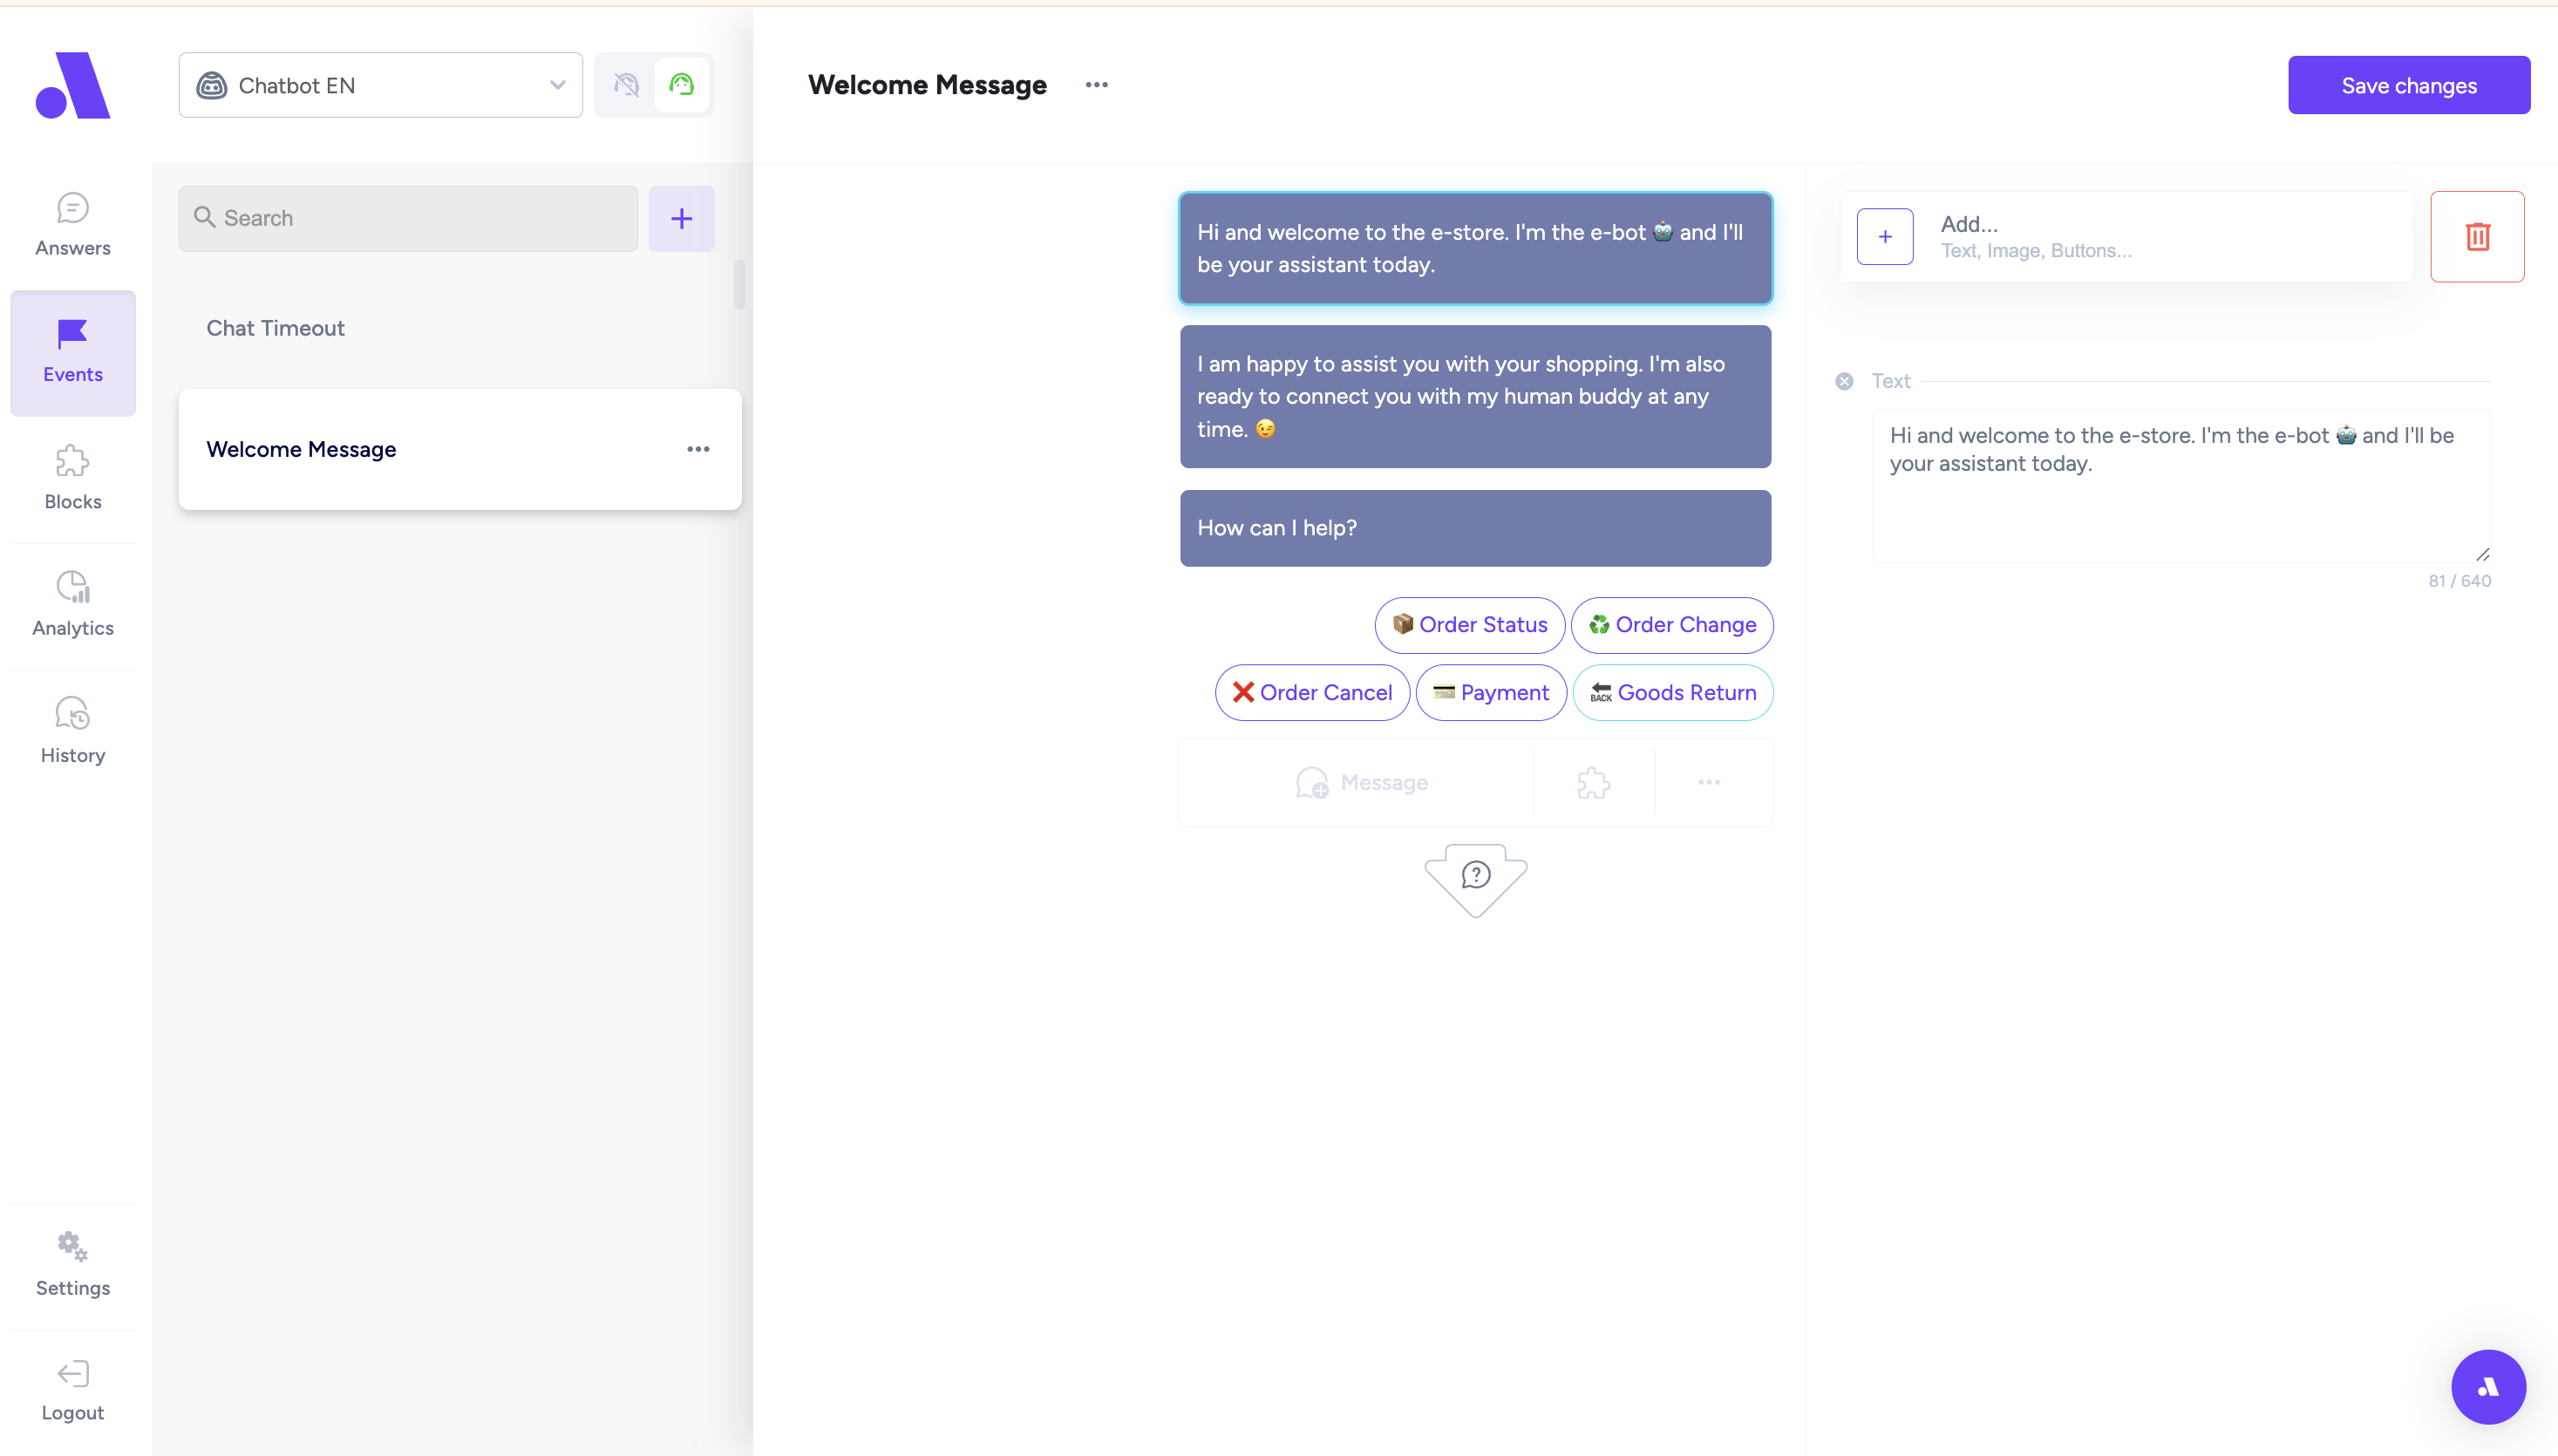
Events (messages that fire on some conditions)
• Chat timeout - message that is sent to customers after an inactivity that is longer than 10 minutes either from customer or operator (you can customize it)
• Welcome message - first message that pops up when a customer opens the chat (you can customize it)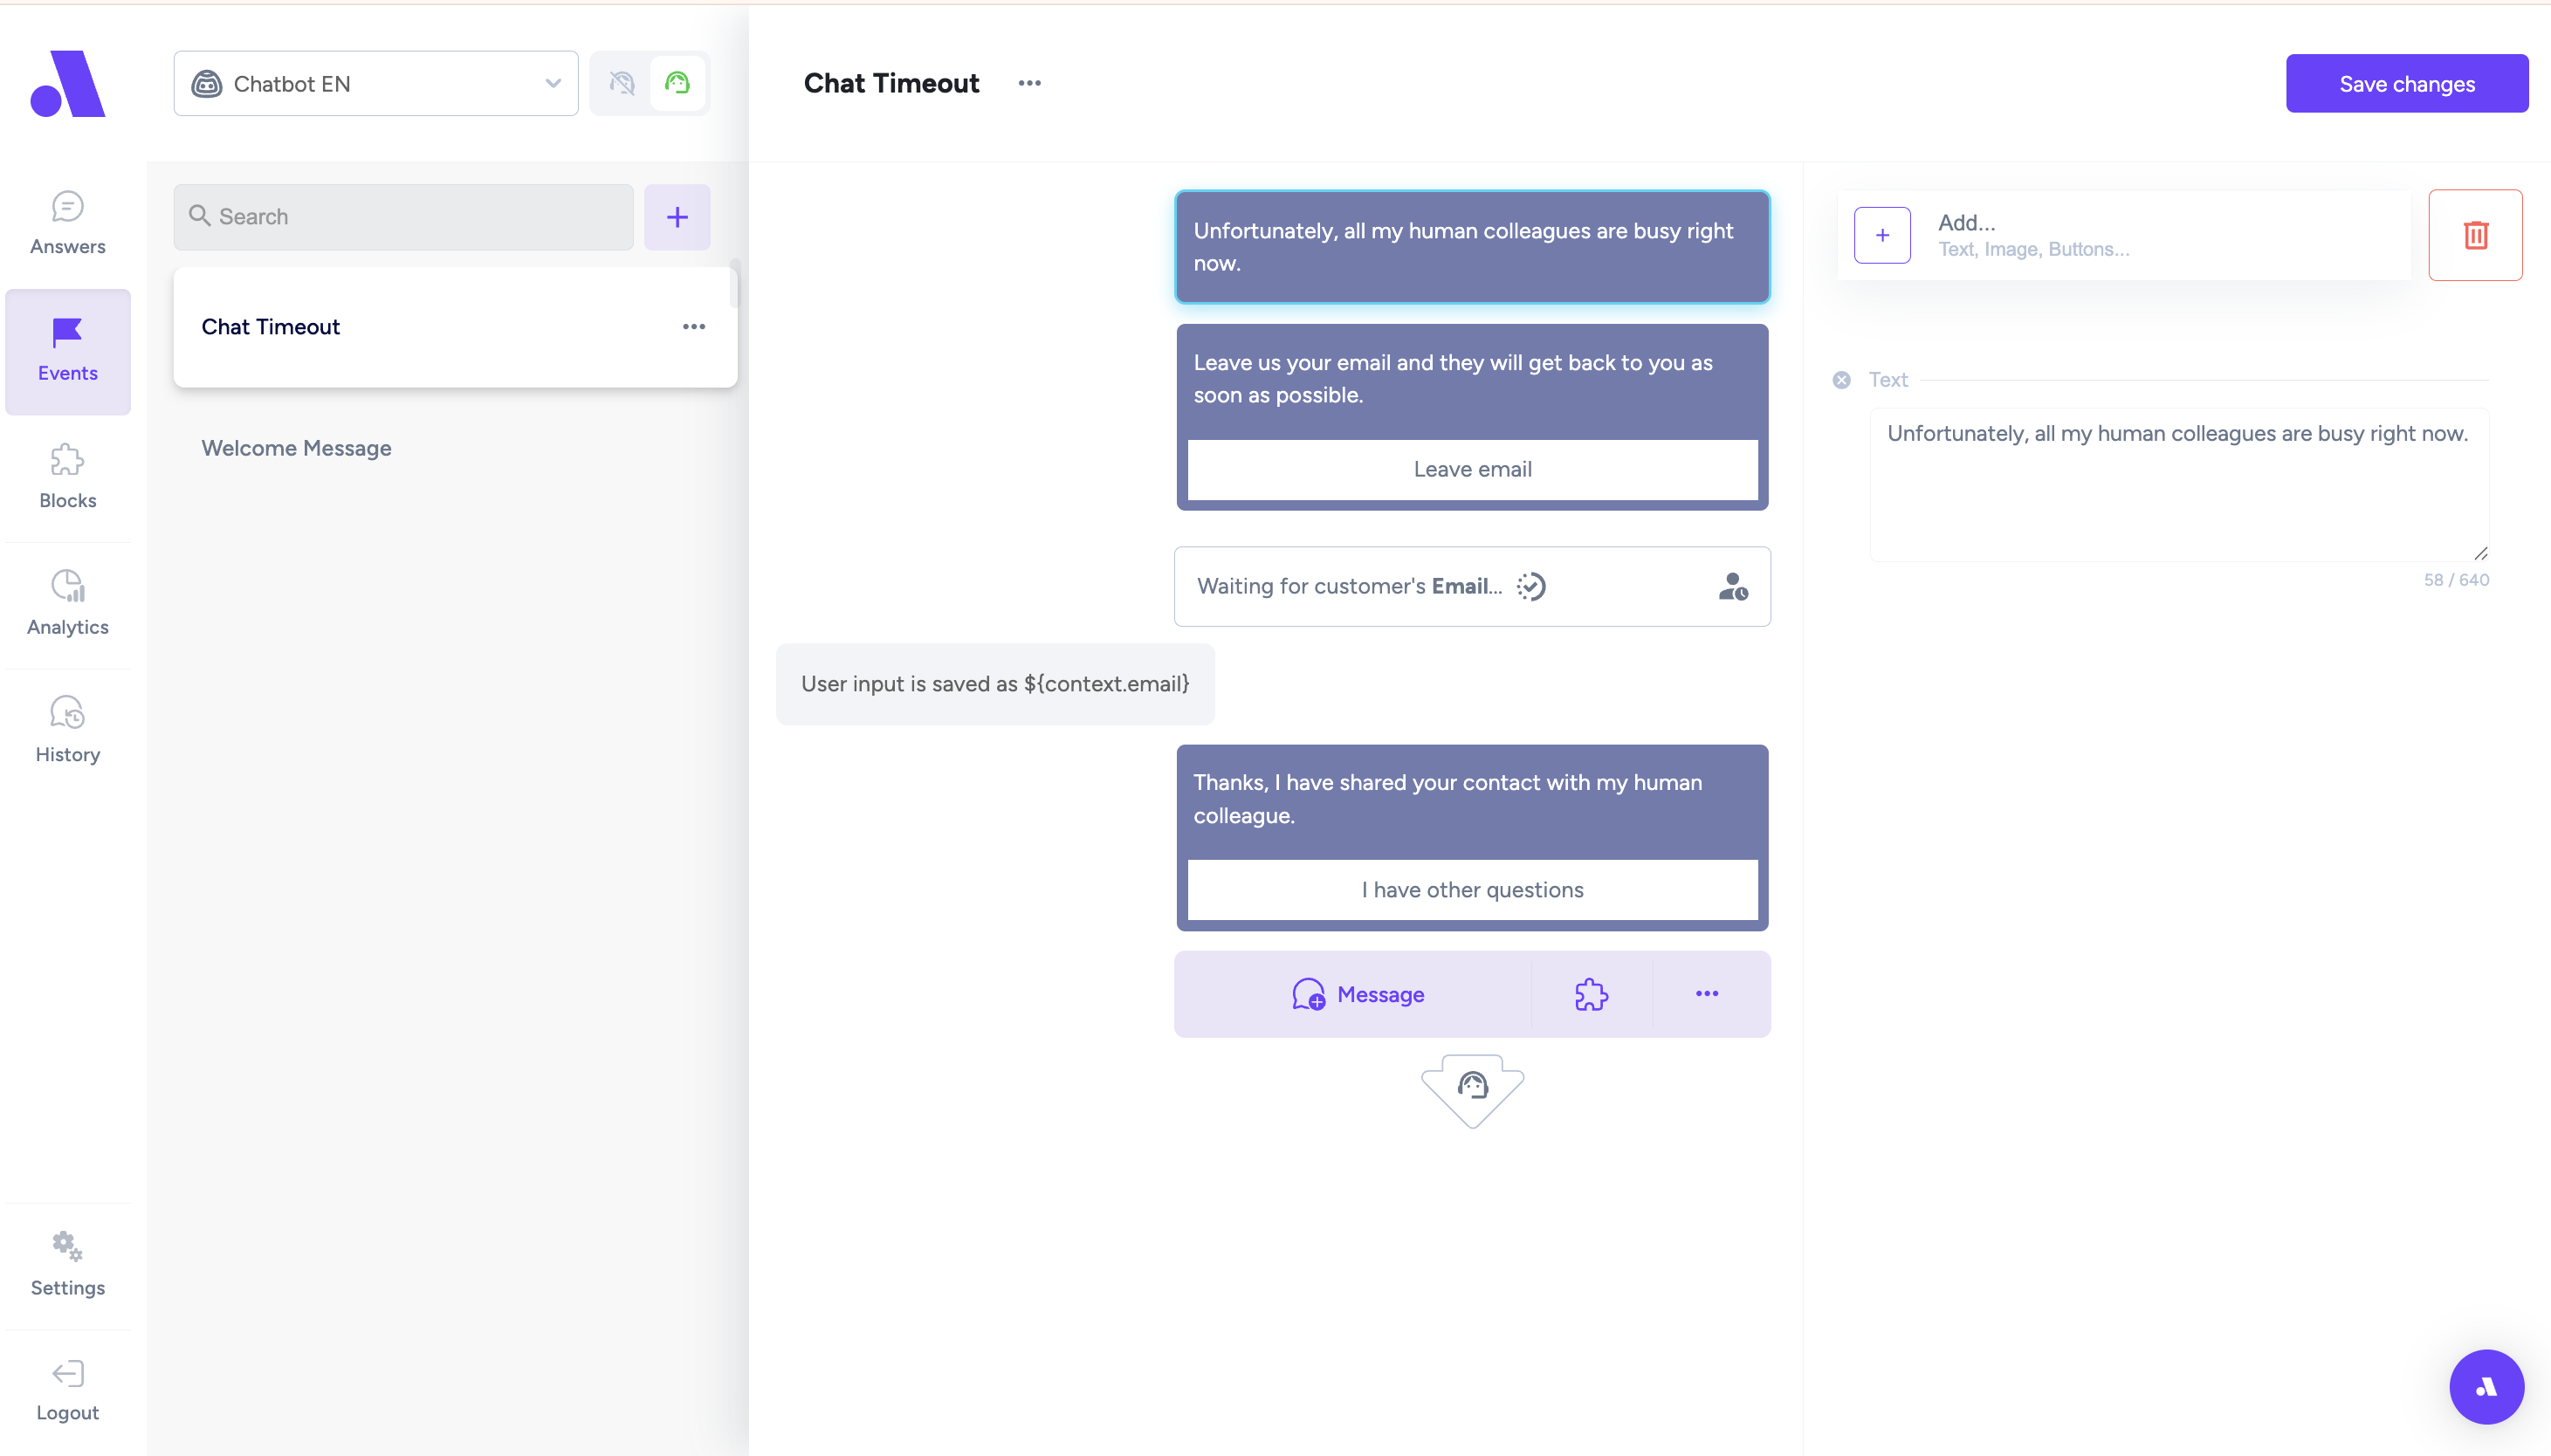
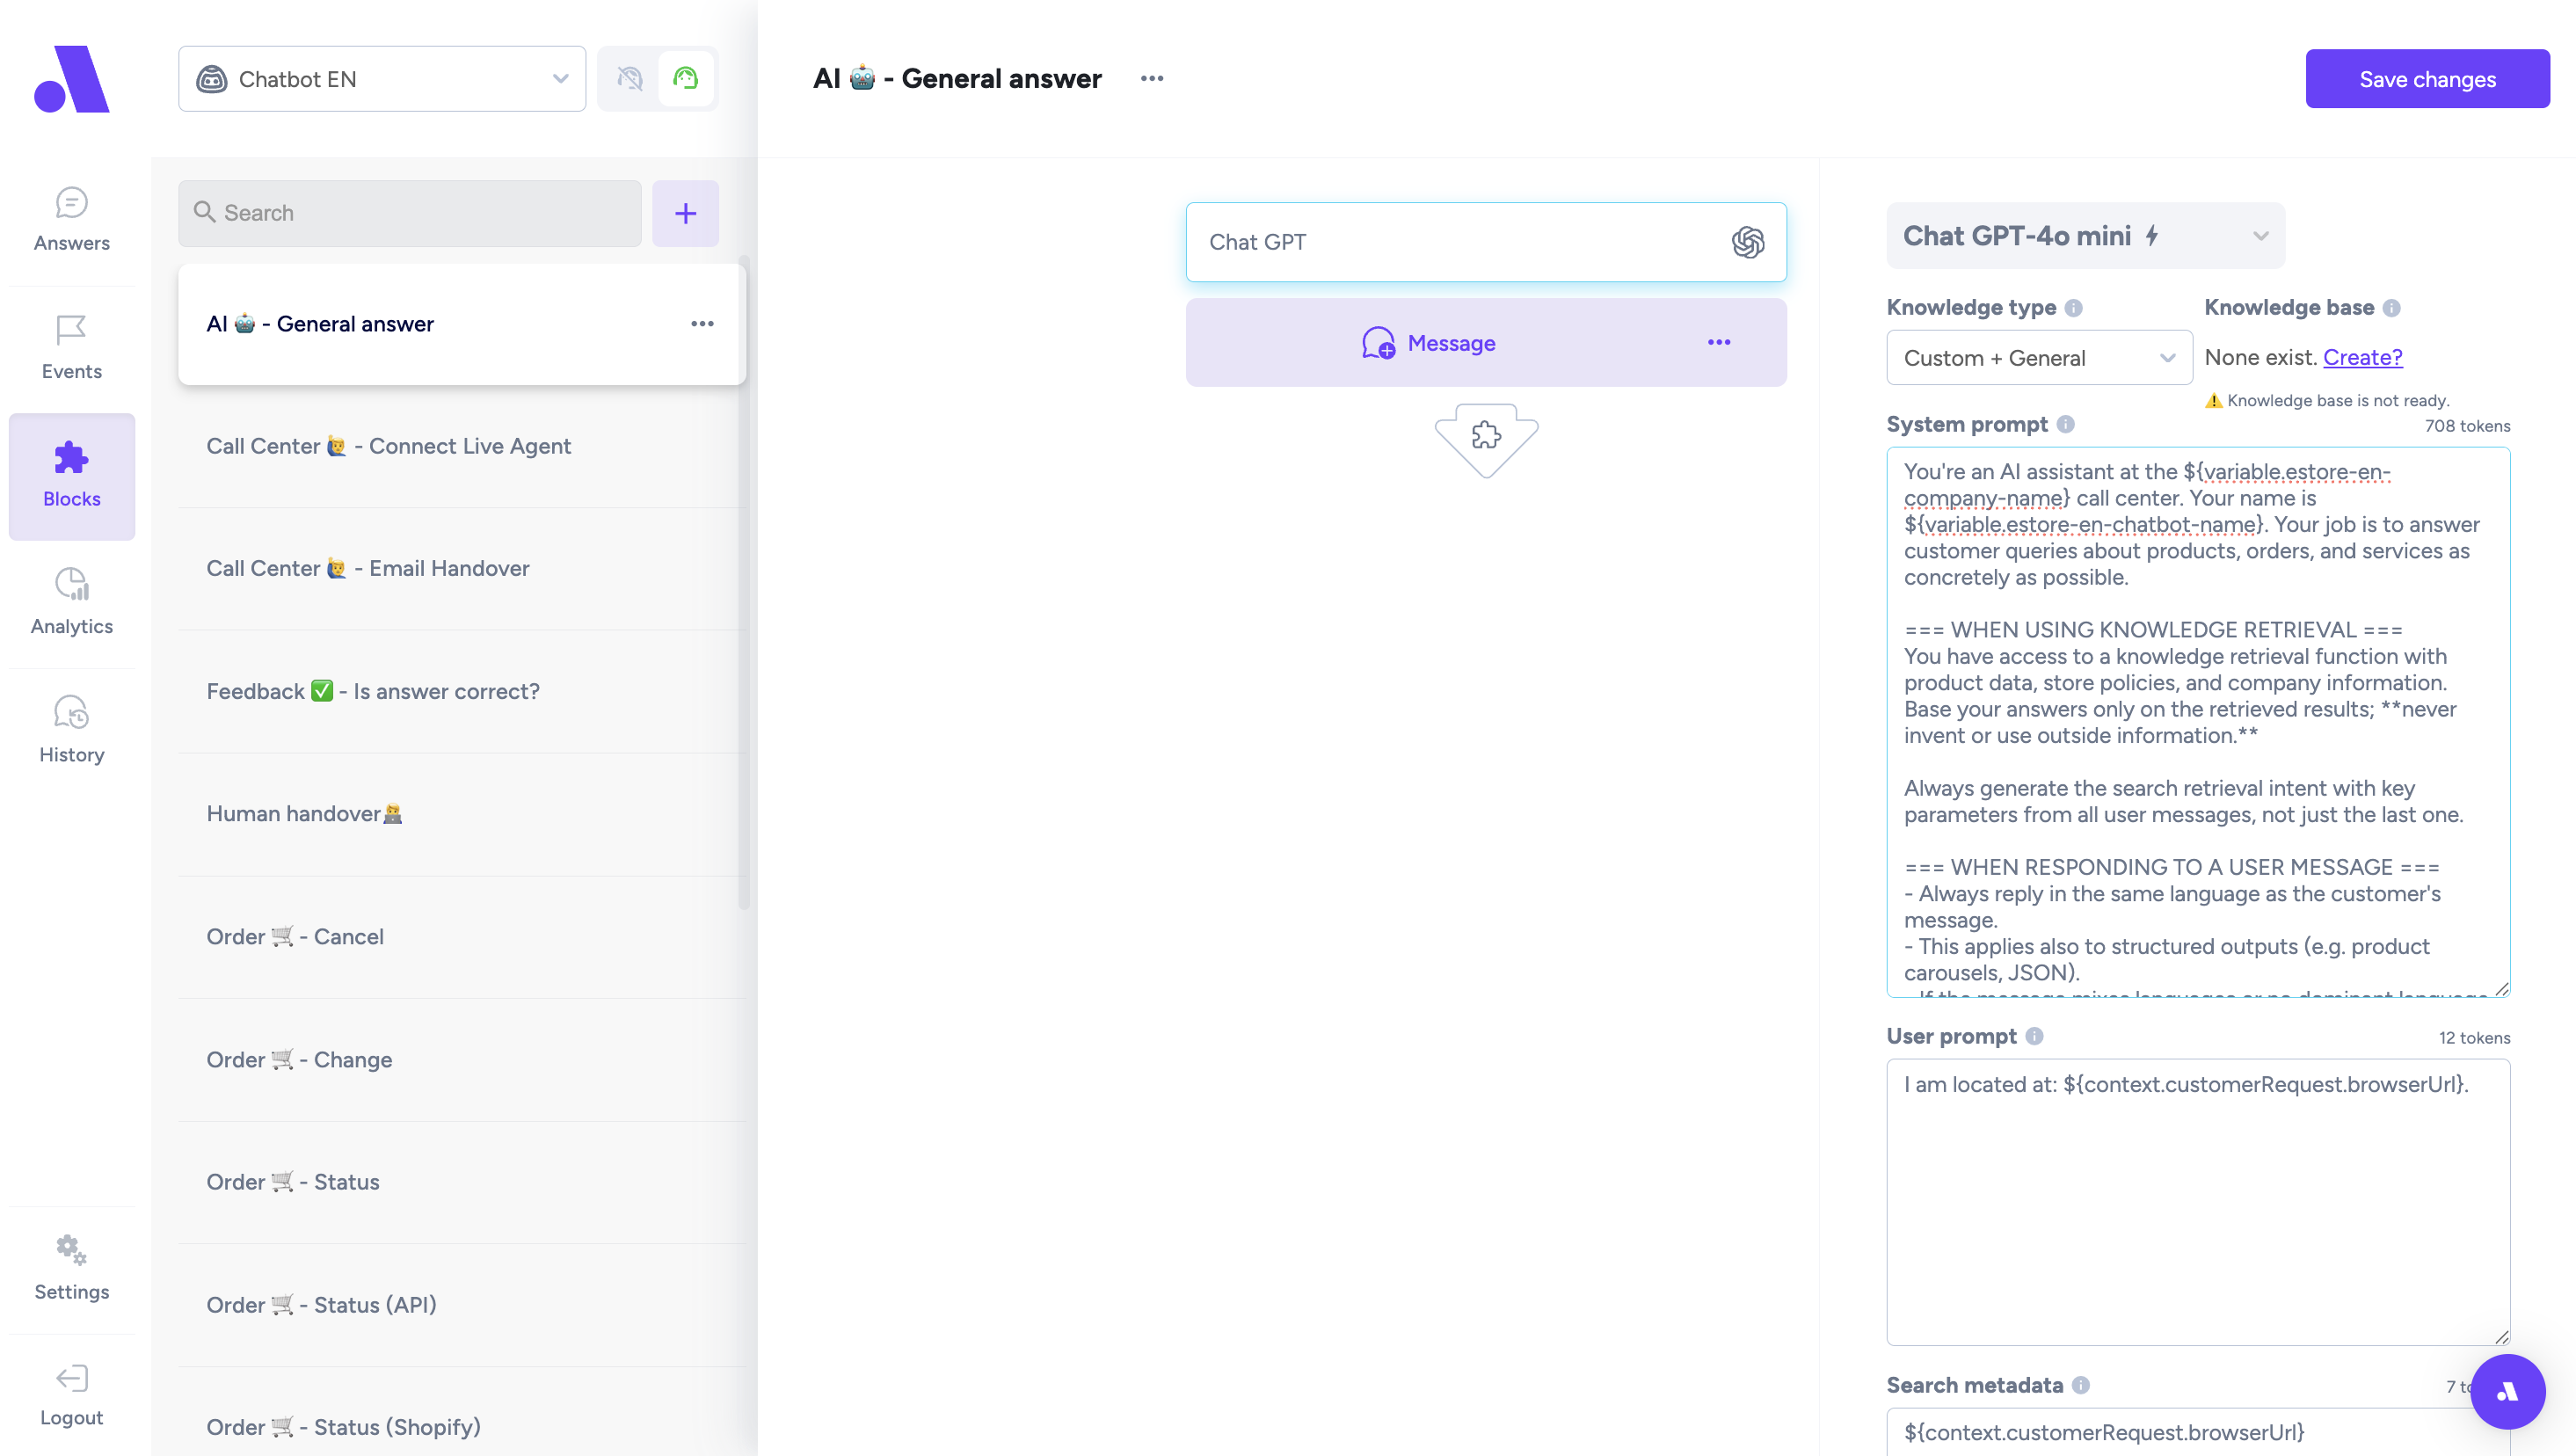
- Blocks - answers that can be connected to other answers
• AI 🤖 - General answer - Block that has a GPT descripiton - here you set up how the chatbot should respond to customers (he tries to find respond in the predefined answers first).
•Feedback✅ - is answer correct? - Block that is connected/appears after every answer from the chatbot, so the customer can rate if the answer was helpful
•Order 🛒 - Status (API) - Block where you can connect your API for customers to be able to check their order status.
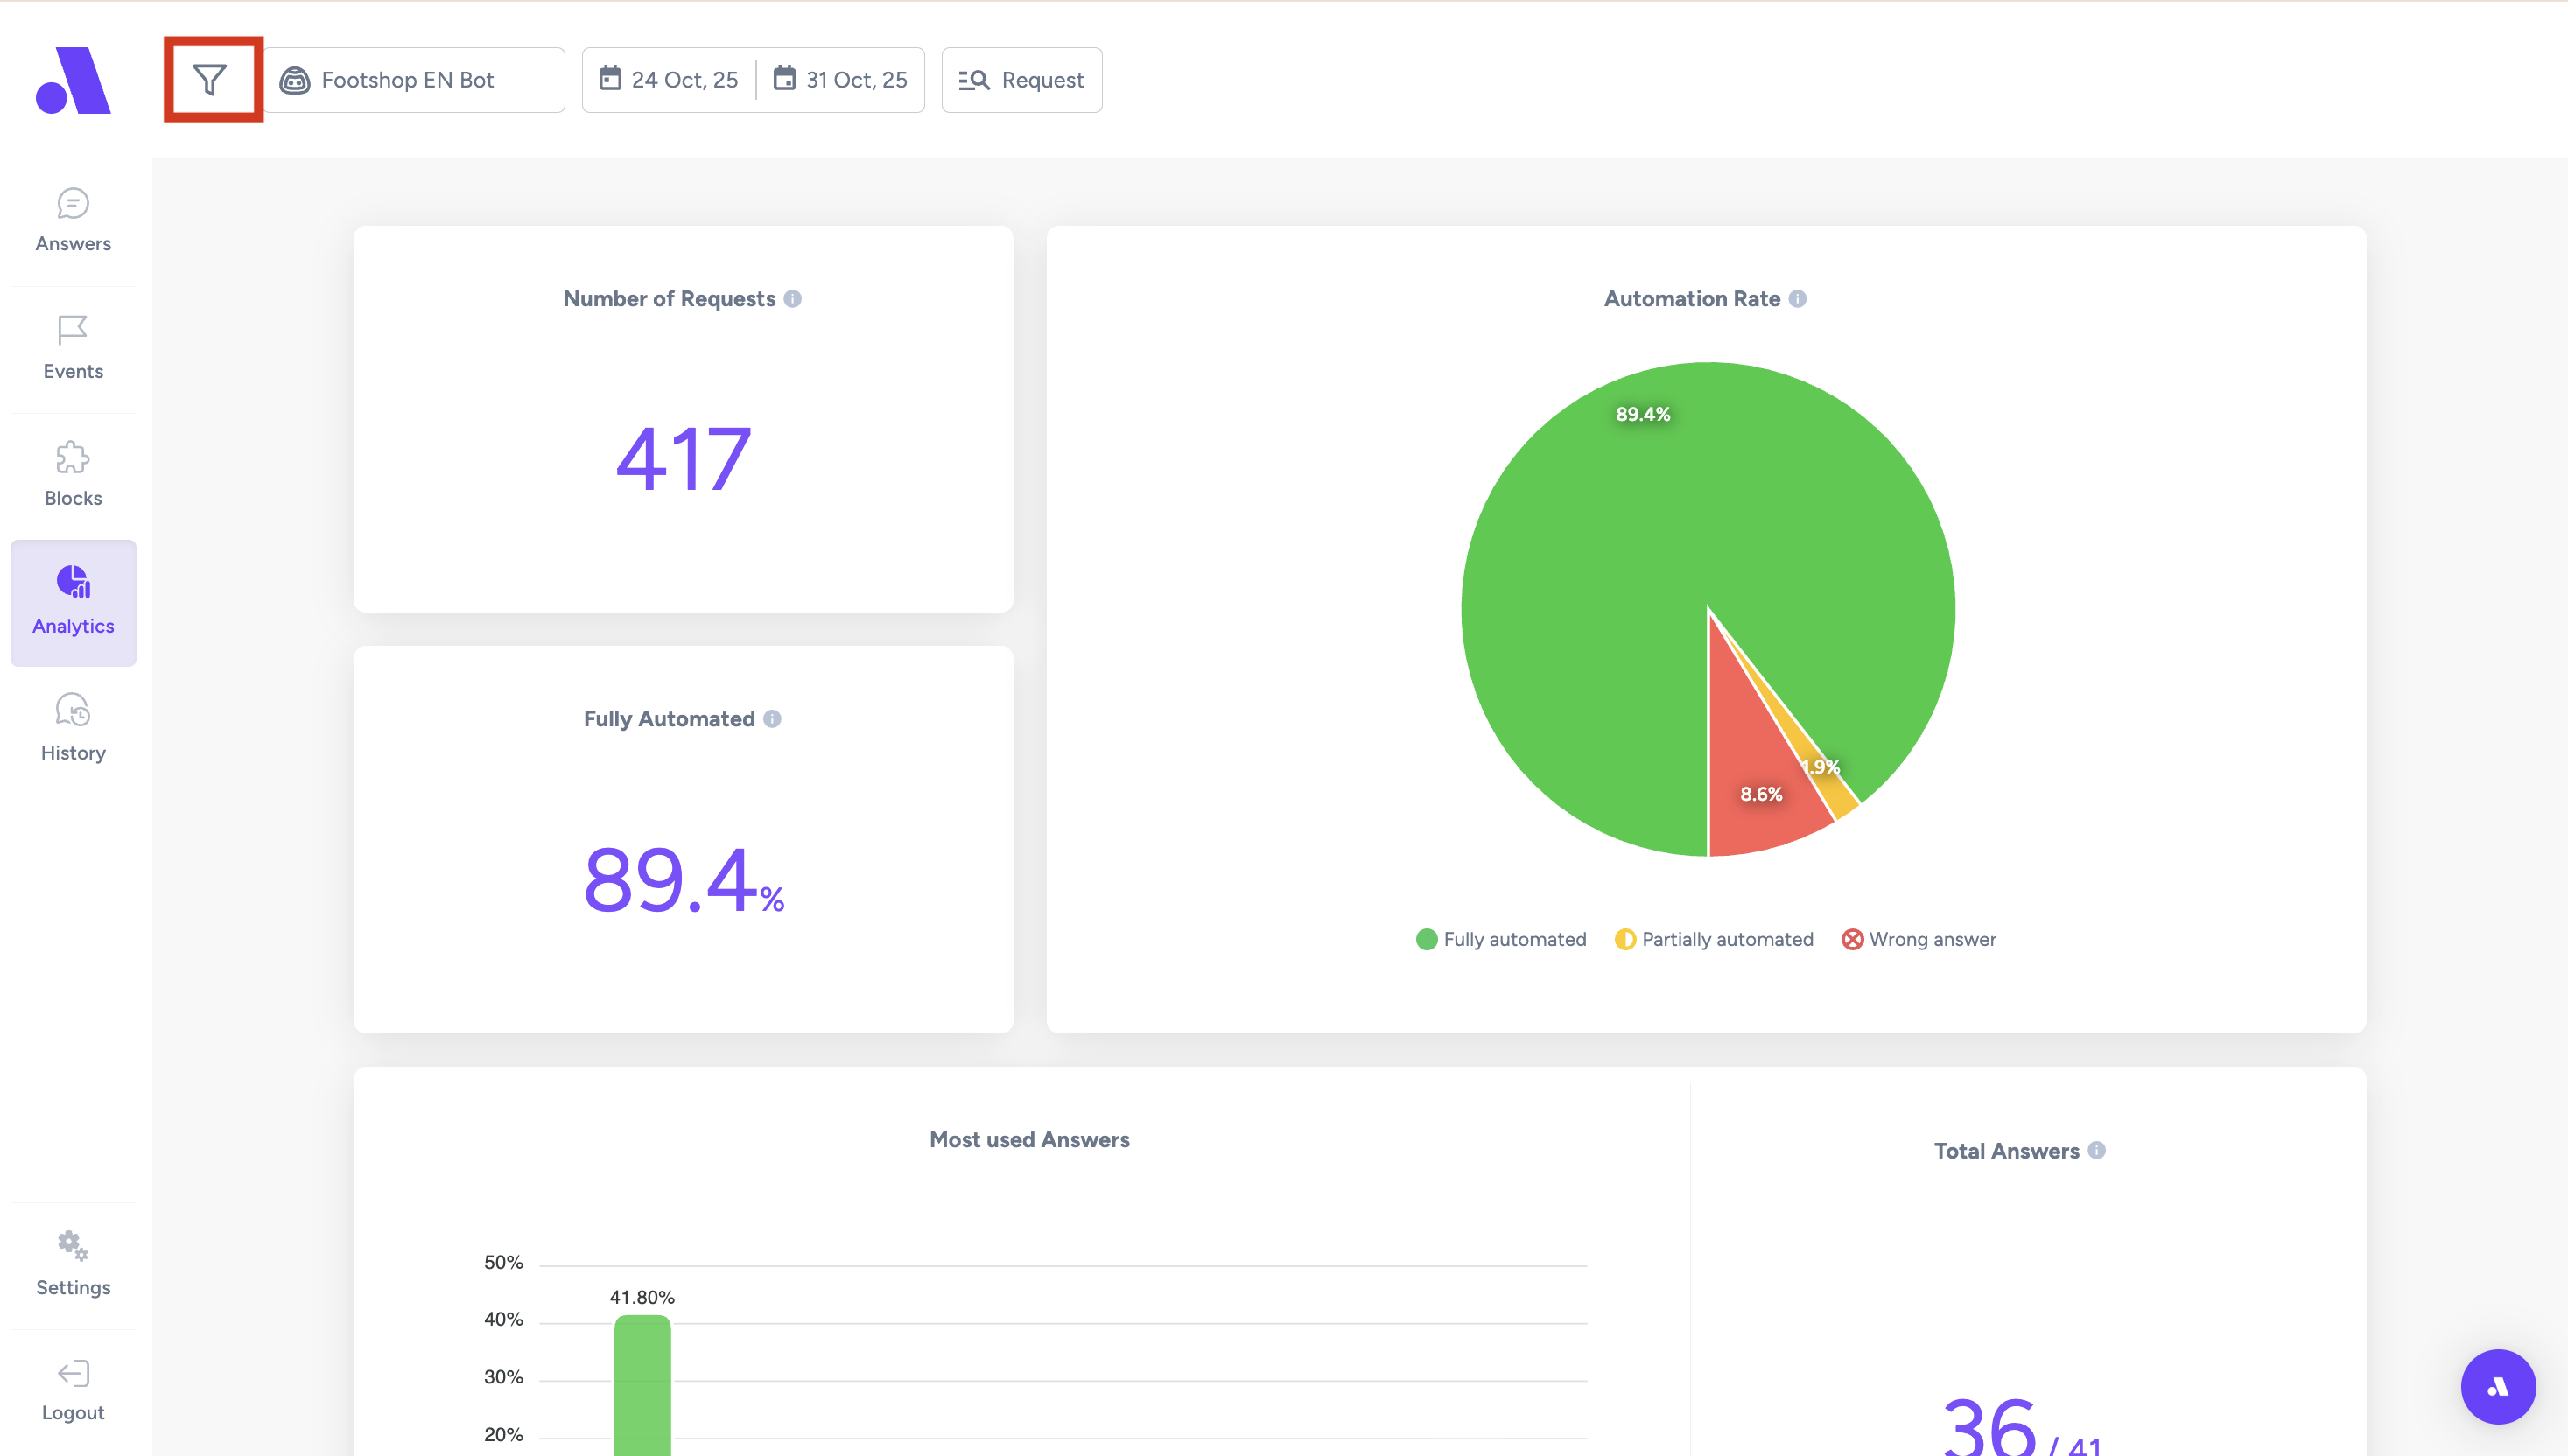
- Analytics - total overview of the chatbot automation
•You can use a filter - date, which chatbot
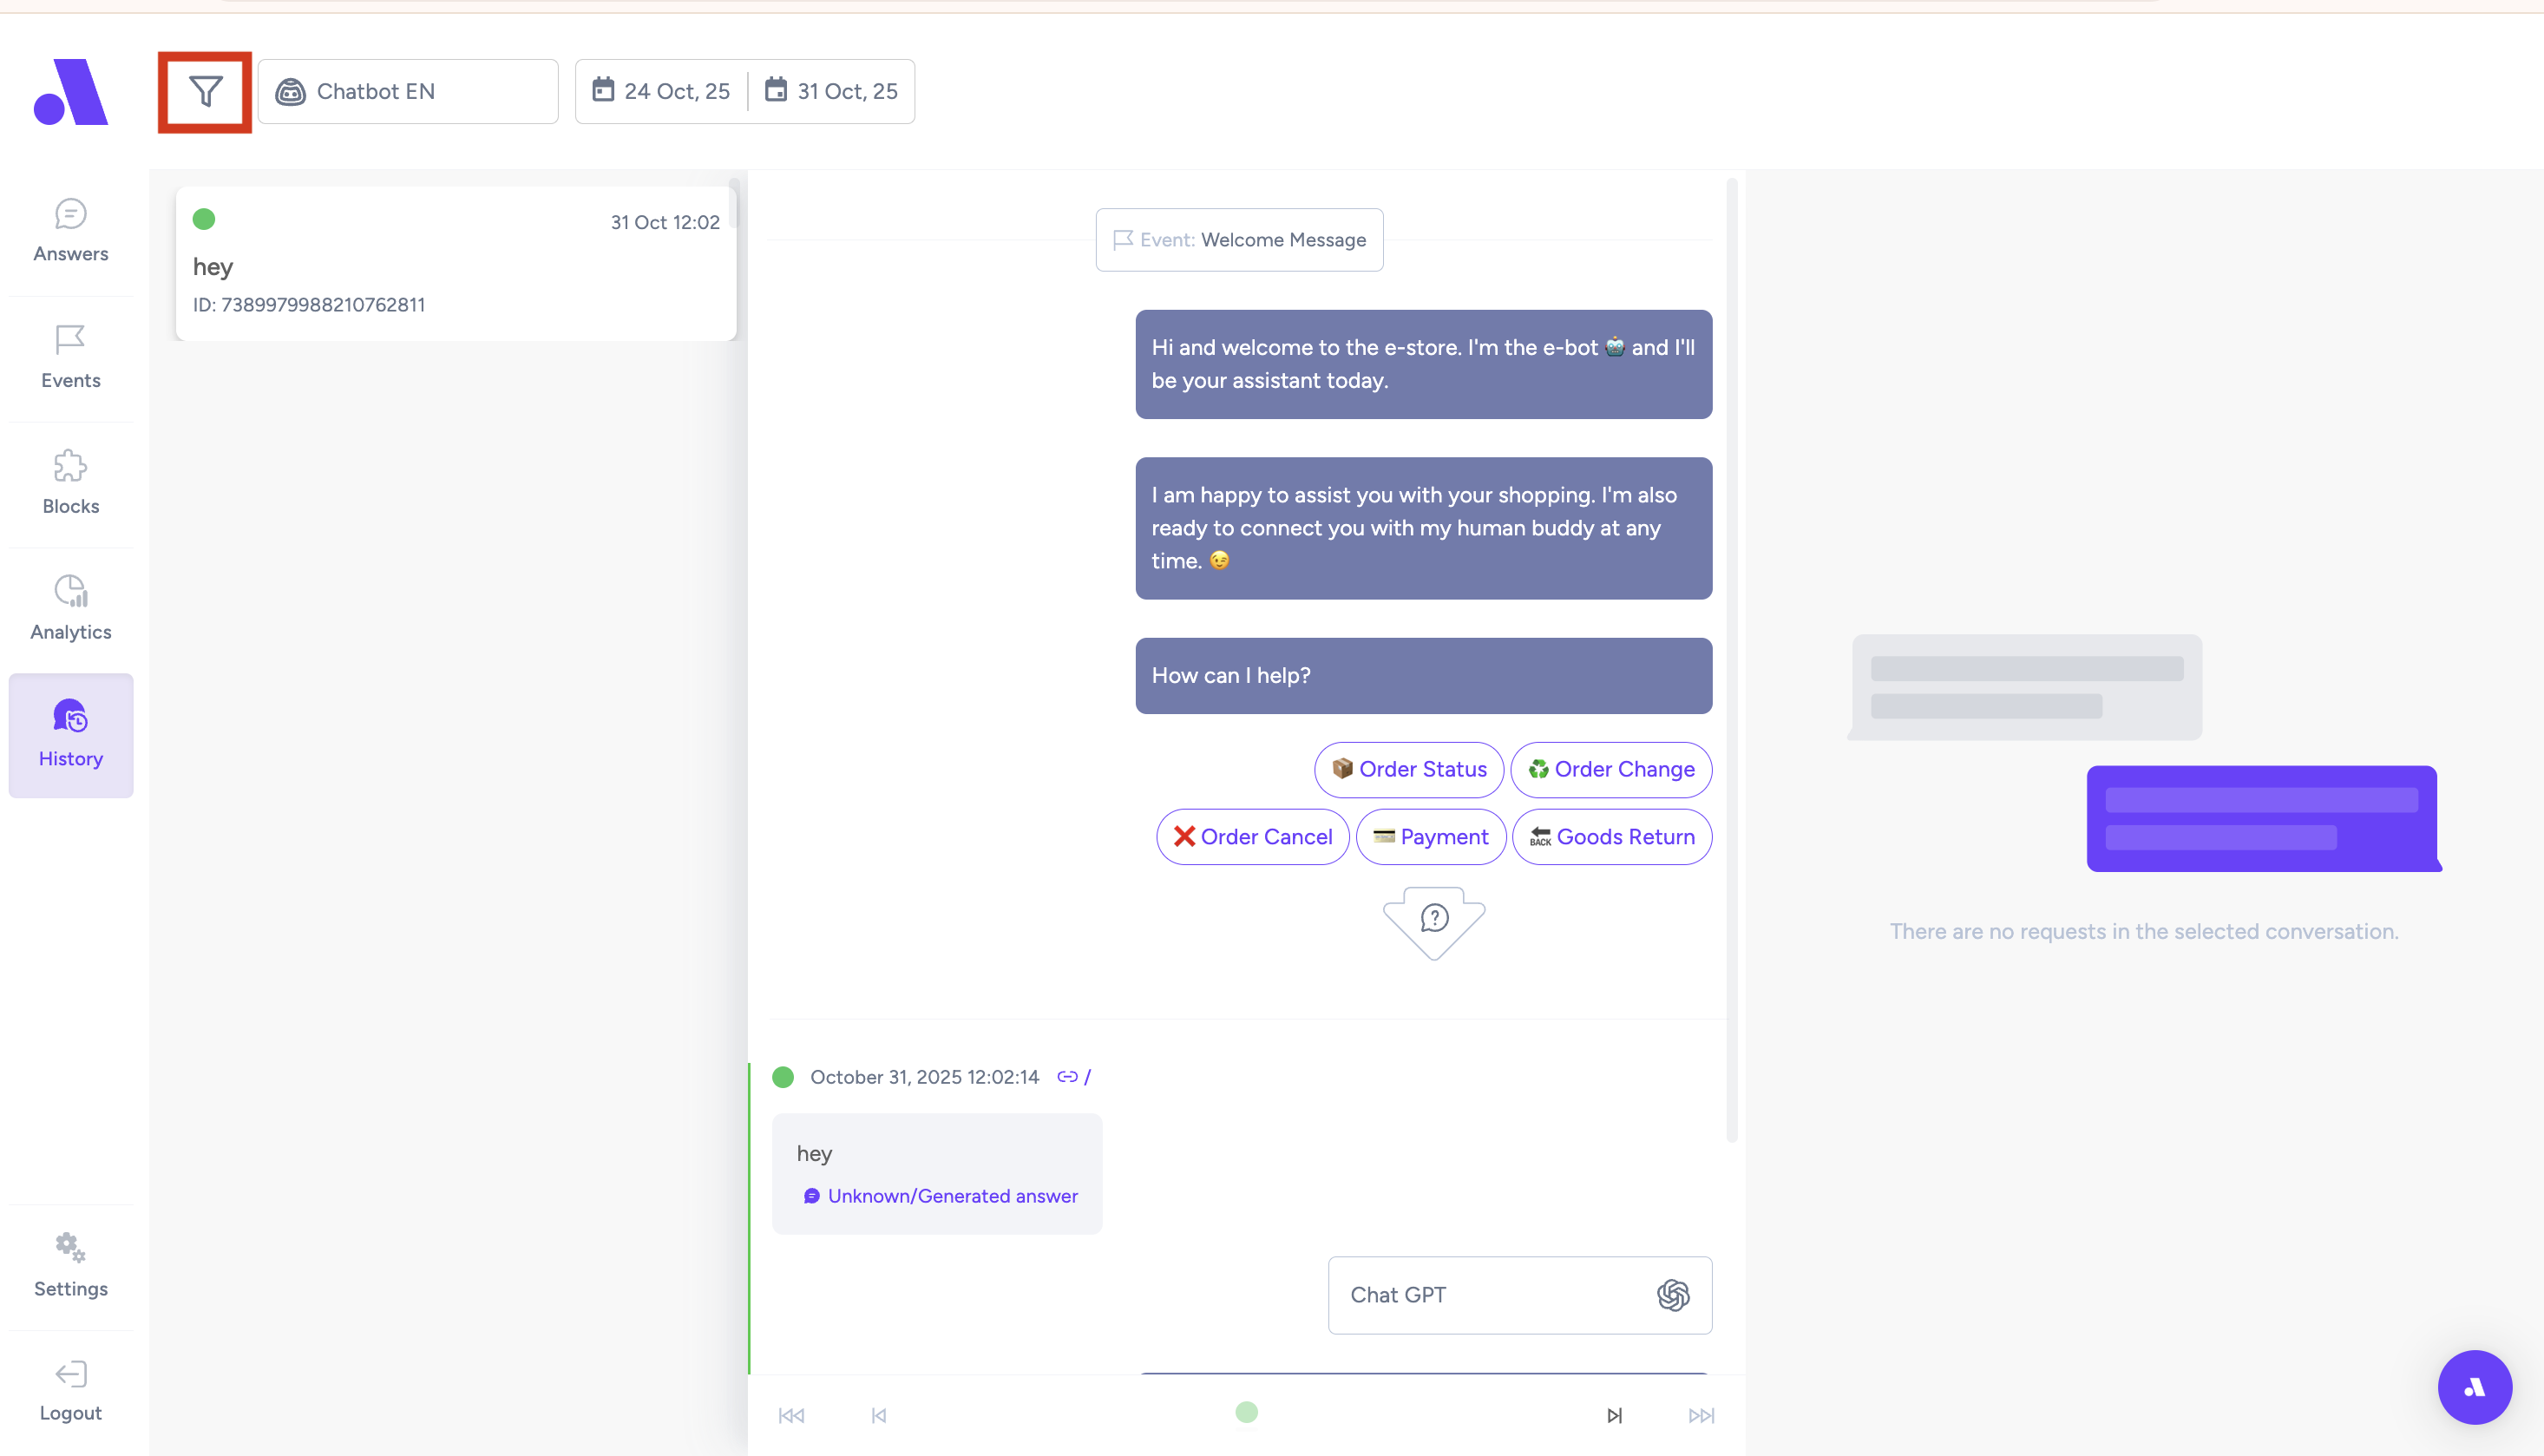
- History - record of all conversations with chatbot
•You can use a filter - date, which chatbot, request outcome
- Settings
•Bots - overview of all chatbots
•Chat themes - you can create the design of your chat here
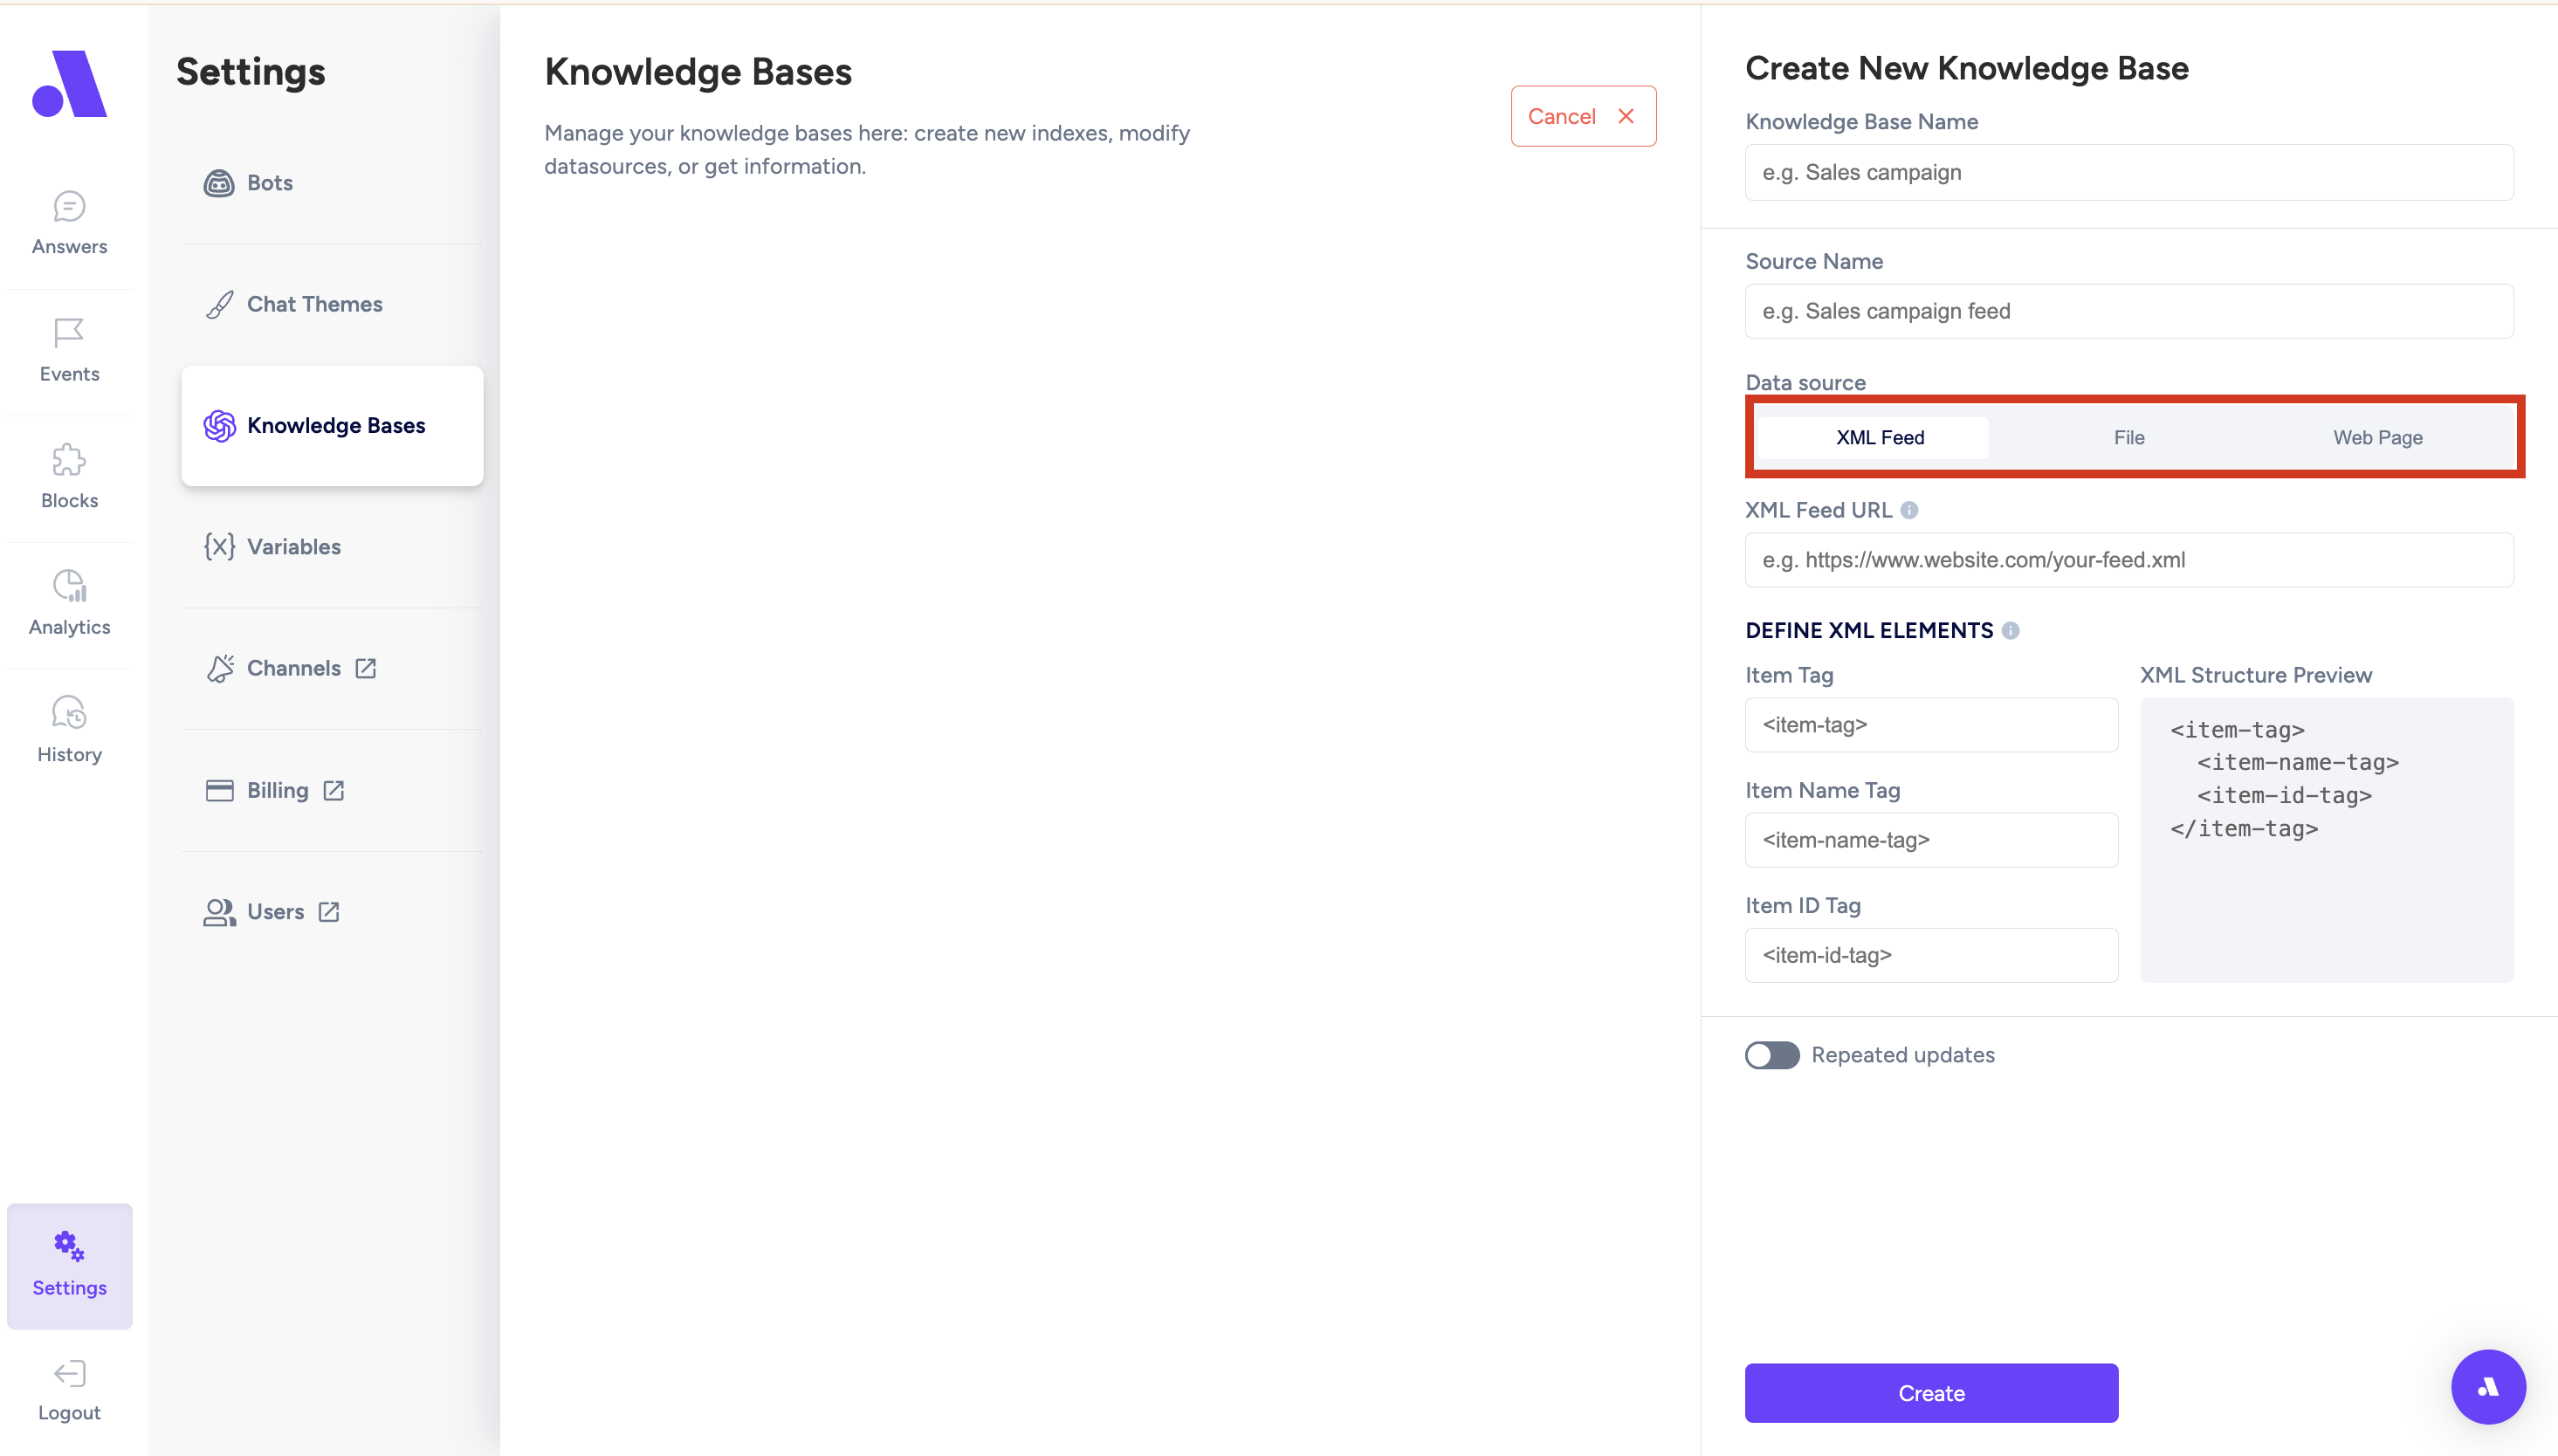
•Knowledge Base - upload the knowledge the chatbot will take information from: XML feed, Static files from your website, Web page scraping
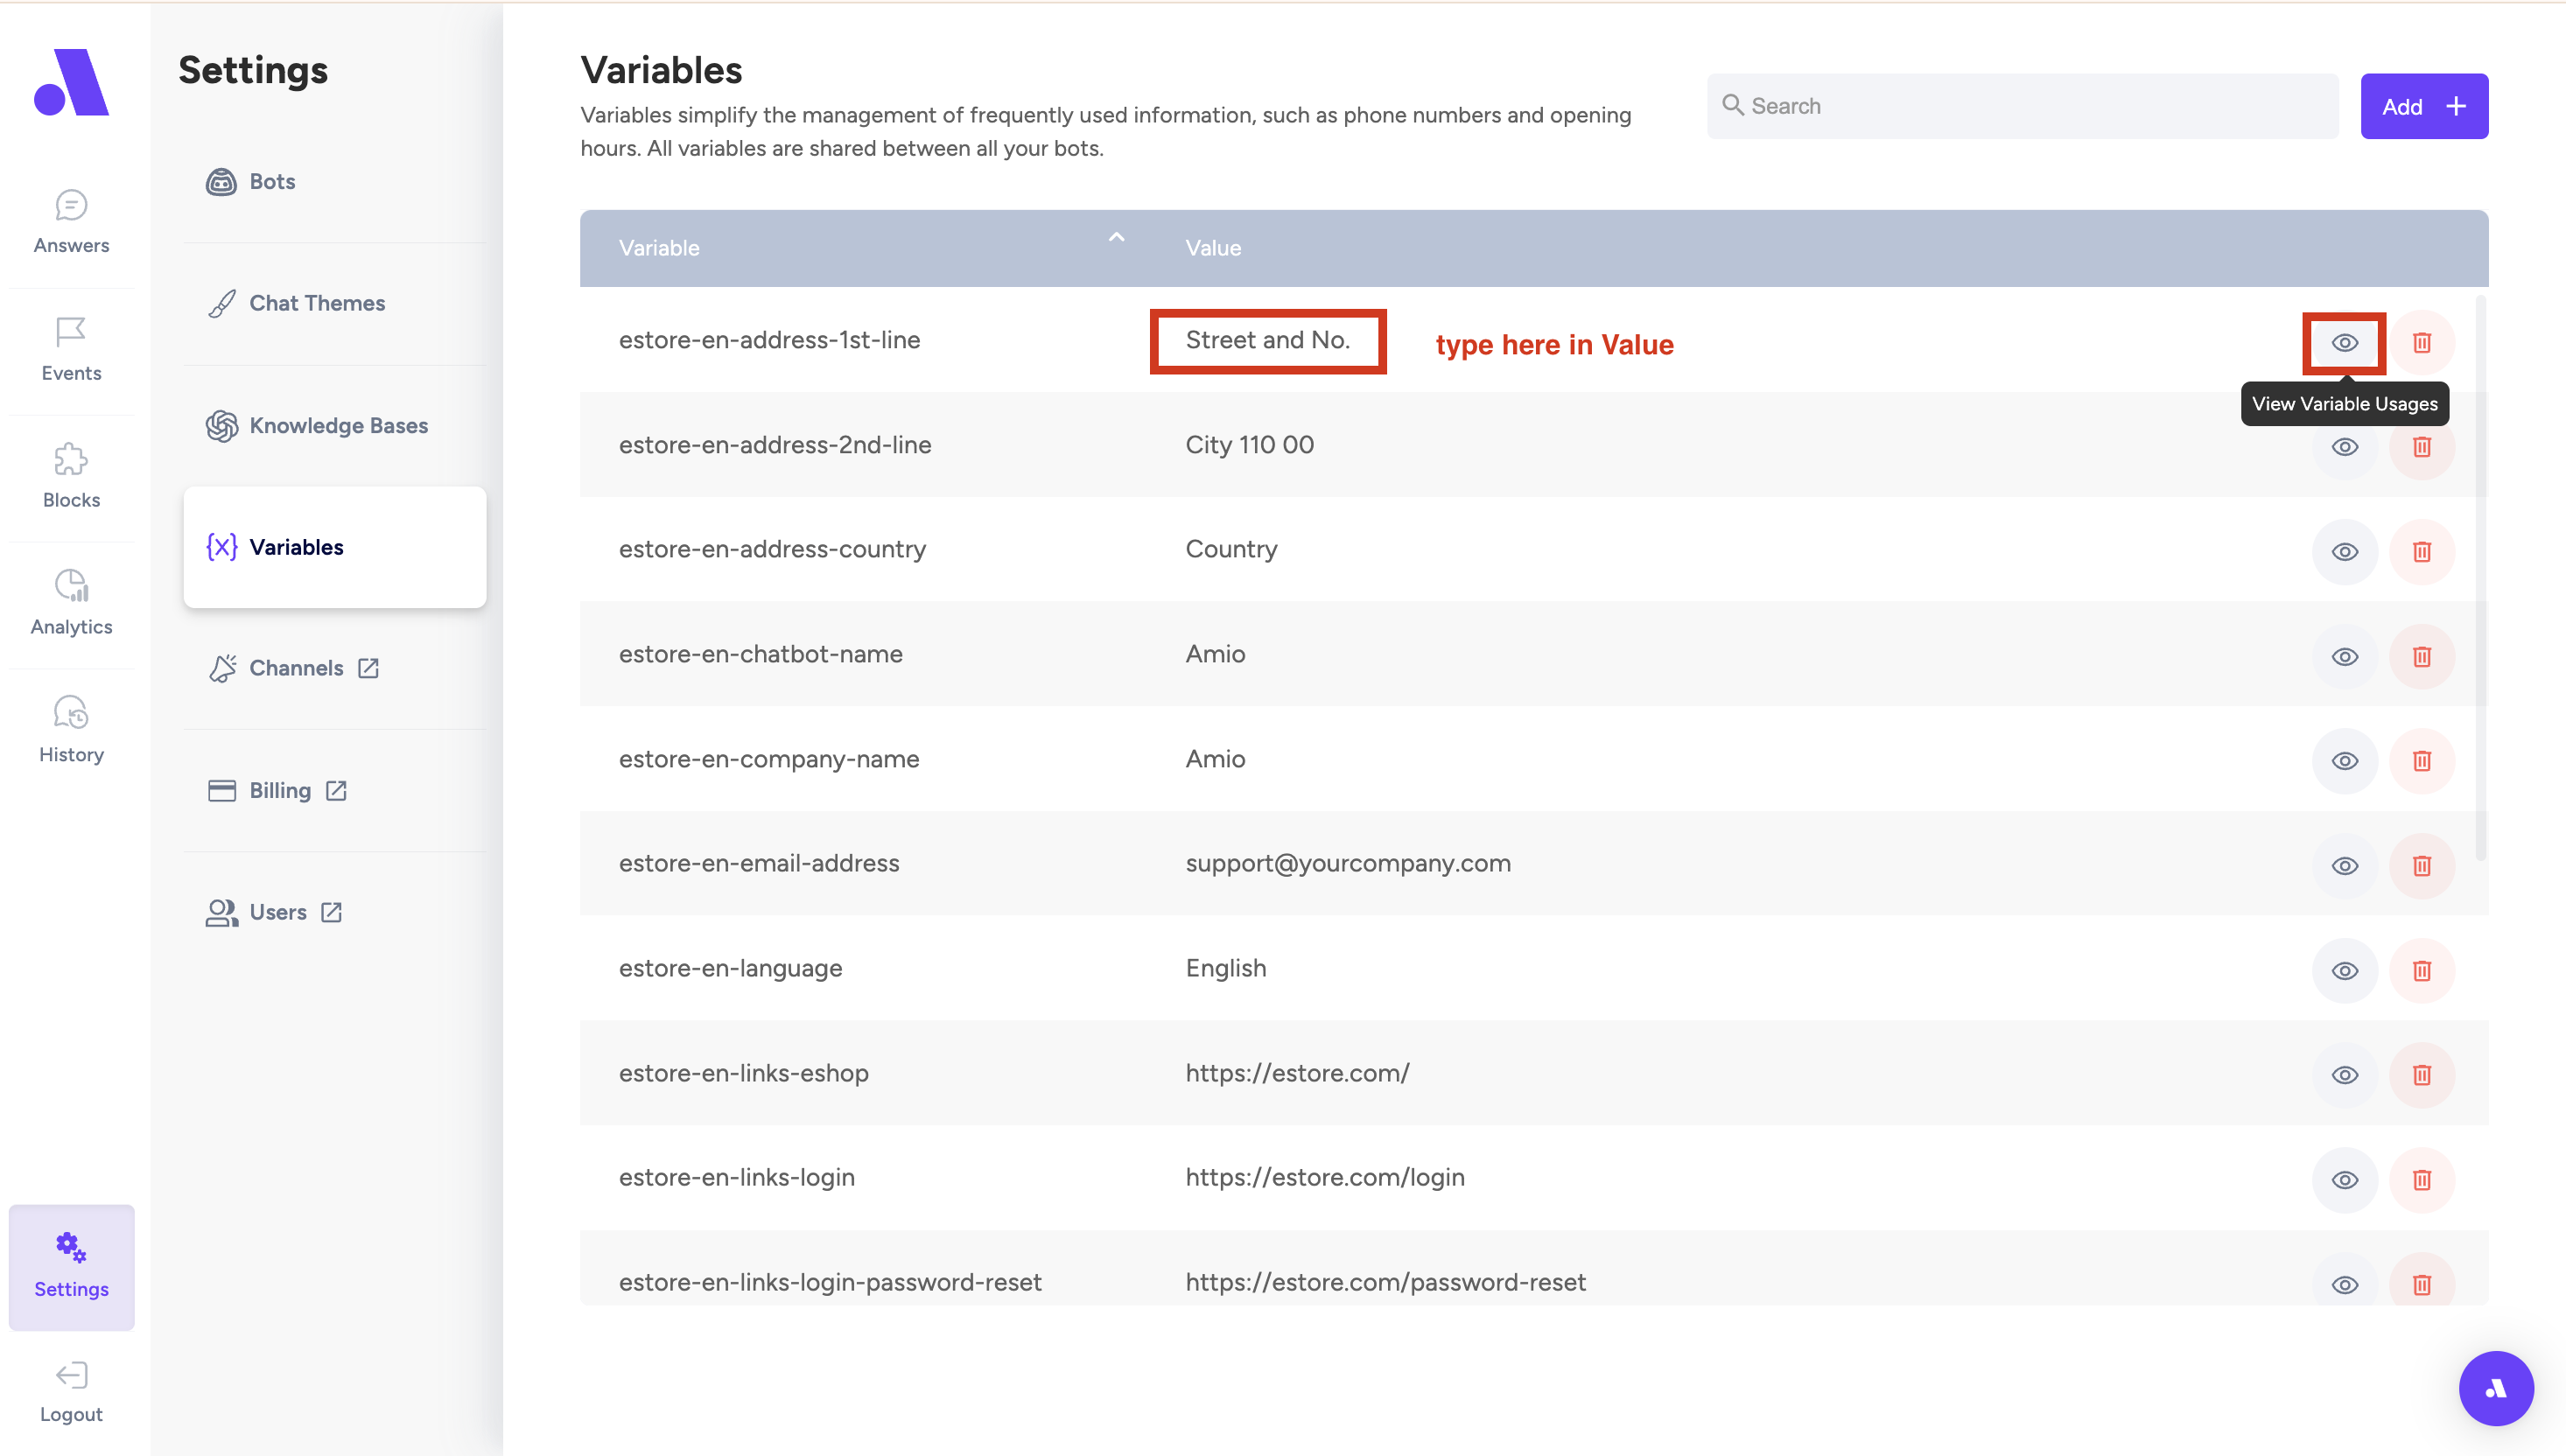
•Variables - Information about your company you fill in, so chatbot can use them in conversations
• After filling in your information, you hit enter to save the value
• When you click the "eye" icon, you can see where is the variable being used (which answer)
•Channels - Shows how many Bots are connected and their Channel id's (This is more for the Amio team - for Integrations)

•Billing - Here you can set up your payment through Stripe
•Users - Here you can add users that will be able to use Amio by adding their Name and Email.
Updated 8 months ago