Connect Amio Chat
This tutorial guides you through the creation of Amio Chat channel and the basic setup of Amio Web Chat.
1. Create Channel
- Log in to app.amio.io.
- In administration, go to channels.
- Click on Add New Channel select Amio Chat.
- Fill in the name of the channel.
- Click Connect.

2. Allow Amio Web Chat to connect to the Channel
- In the details page of your Channel, go to Settings tab.
- Click Edit.
- Click Add Domain and add this domain to the list:
https://chat-widget.static-amio.com:443 - Click Save.
When setup correctly, your Settings tab will look like this:

3. Embed Amio Web Chat to your webpage directly
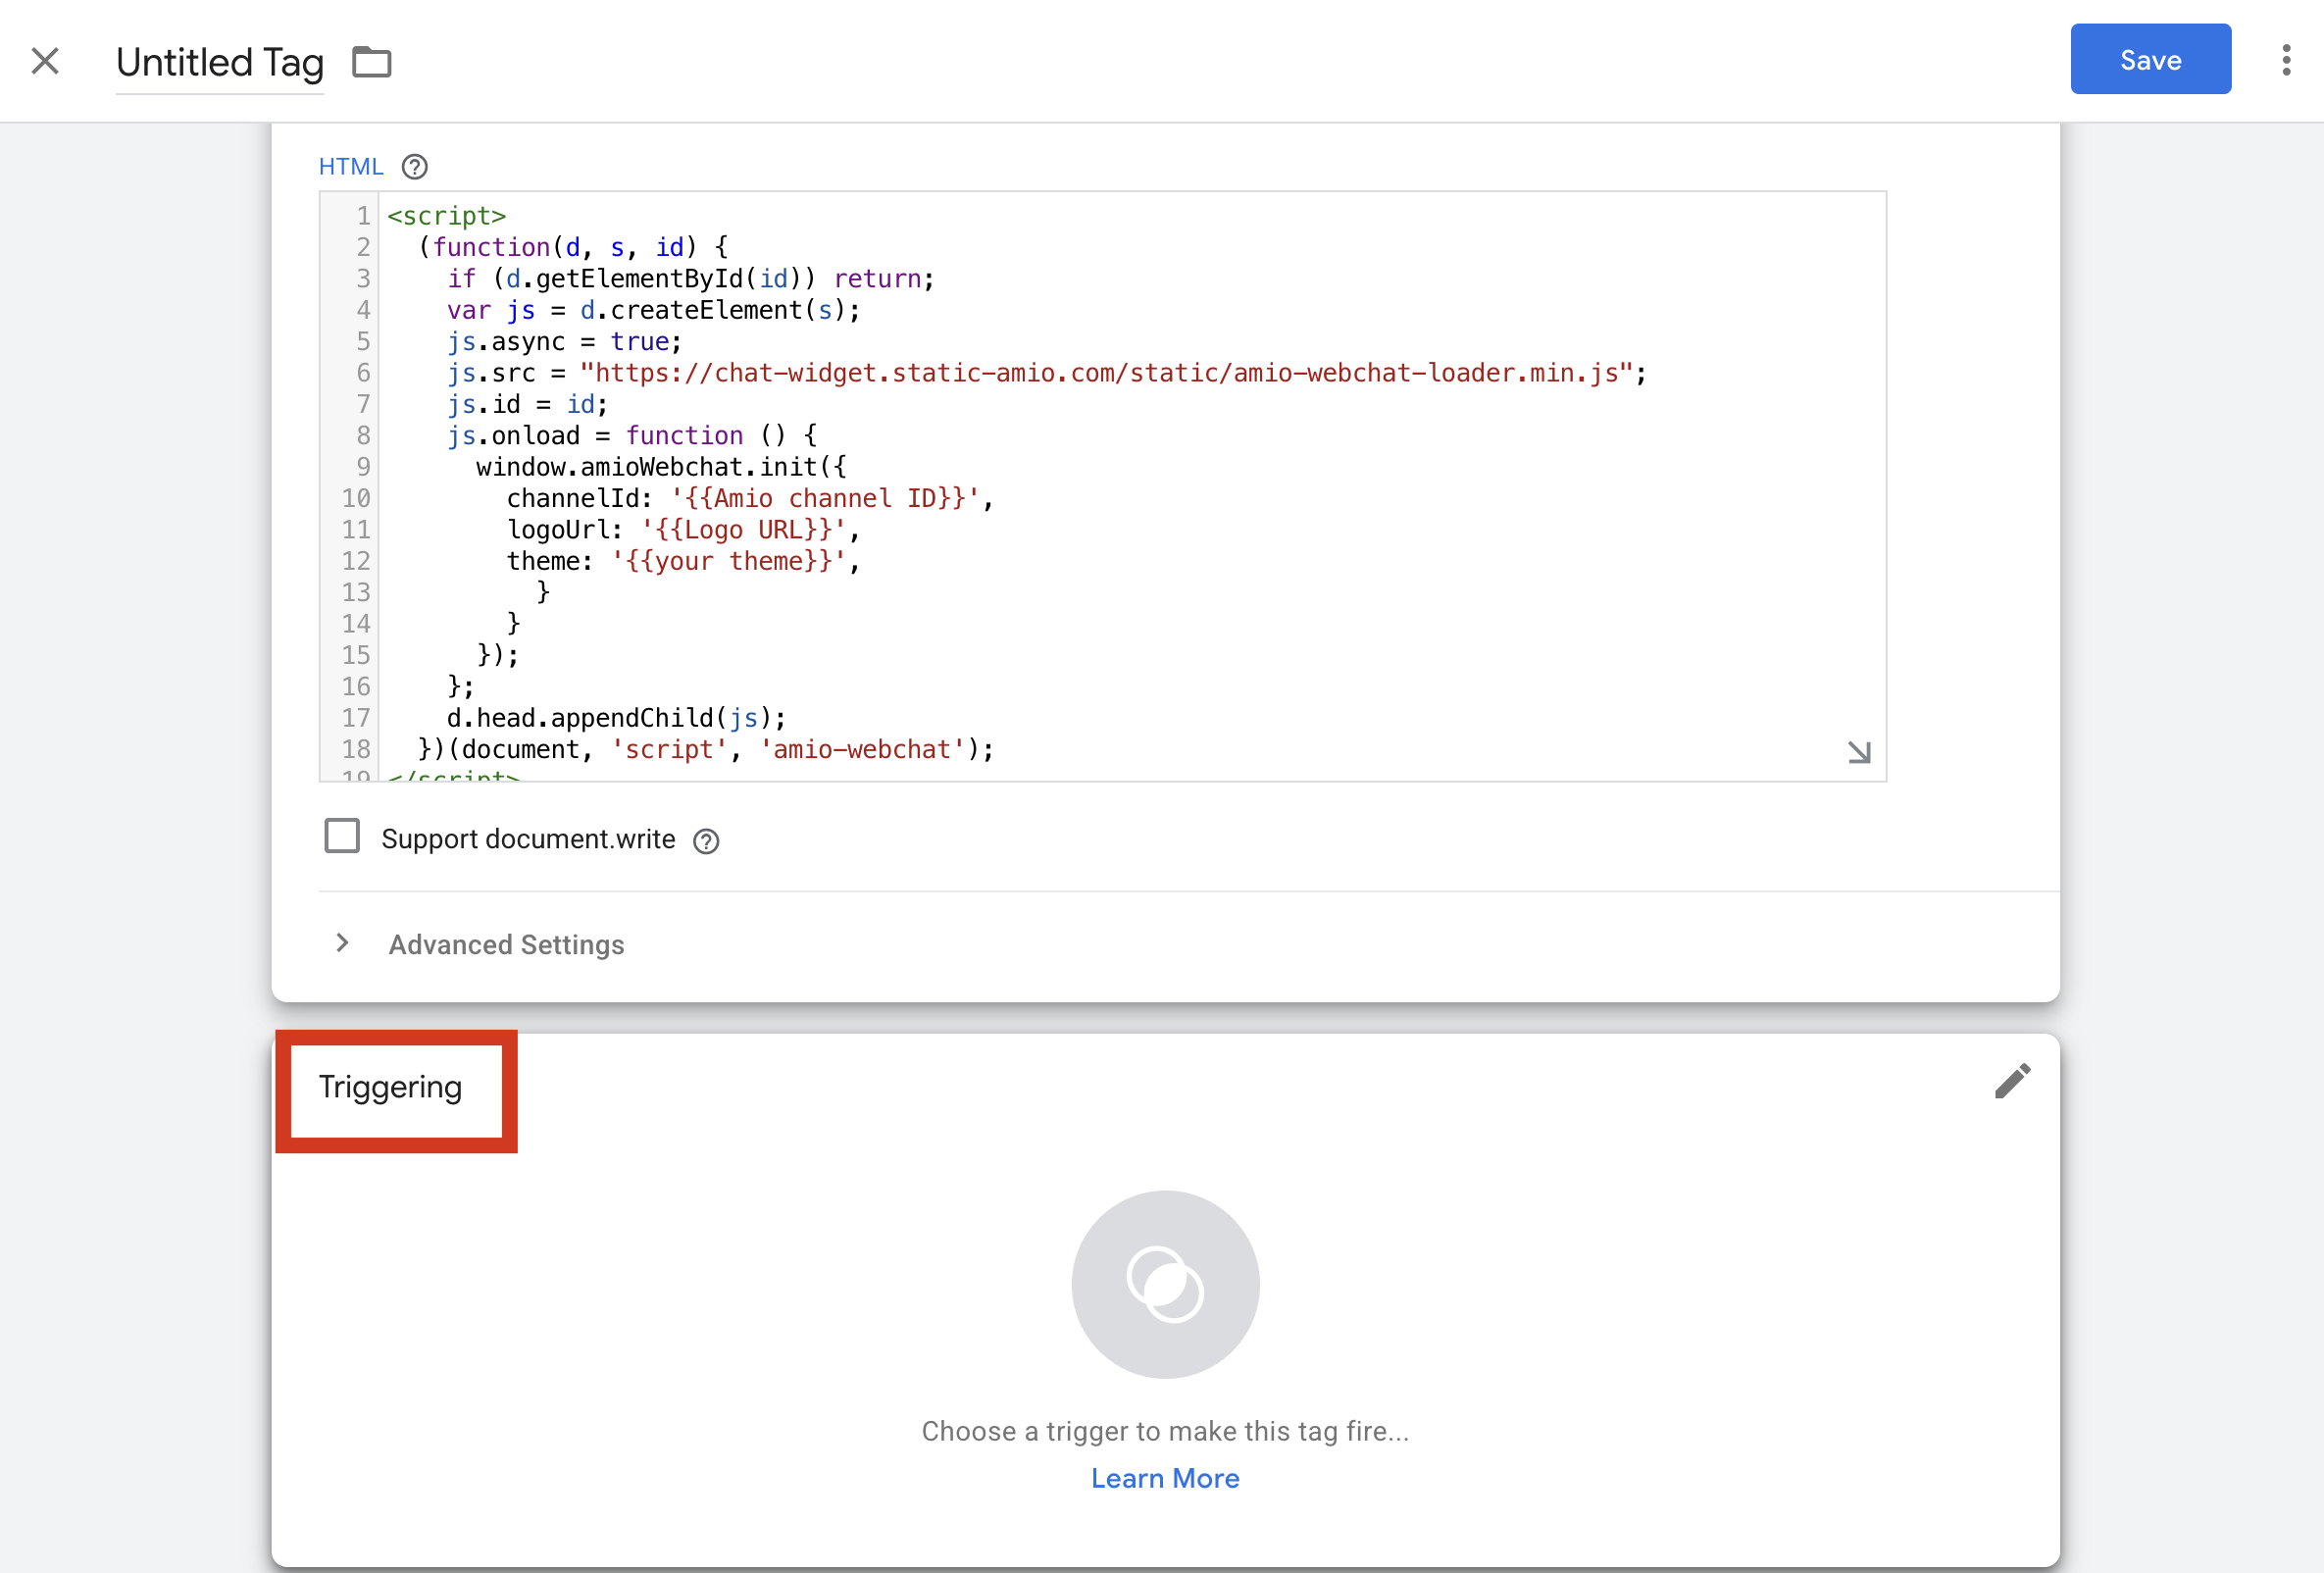
Don't forget to replace
{CHANNEL_ID}with the ID of your Amio Chat channel.
Check all available customization at window.amioWebchat.init()
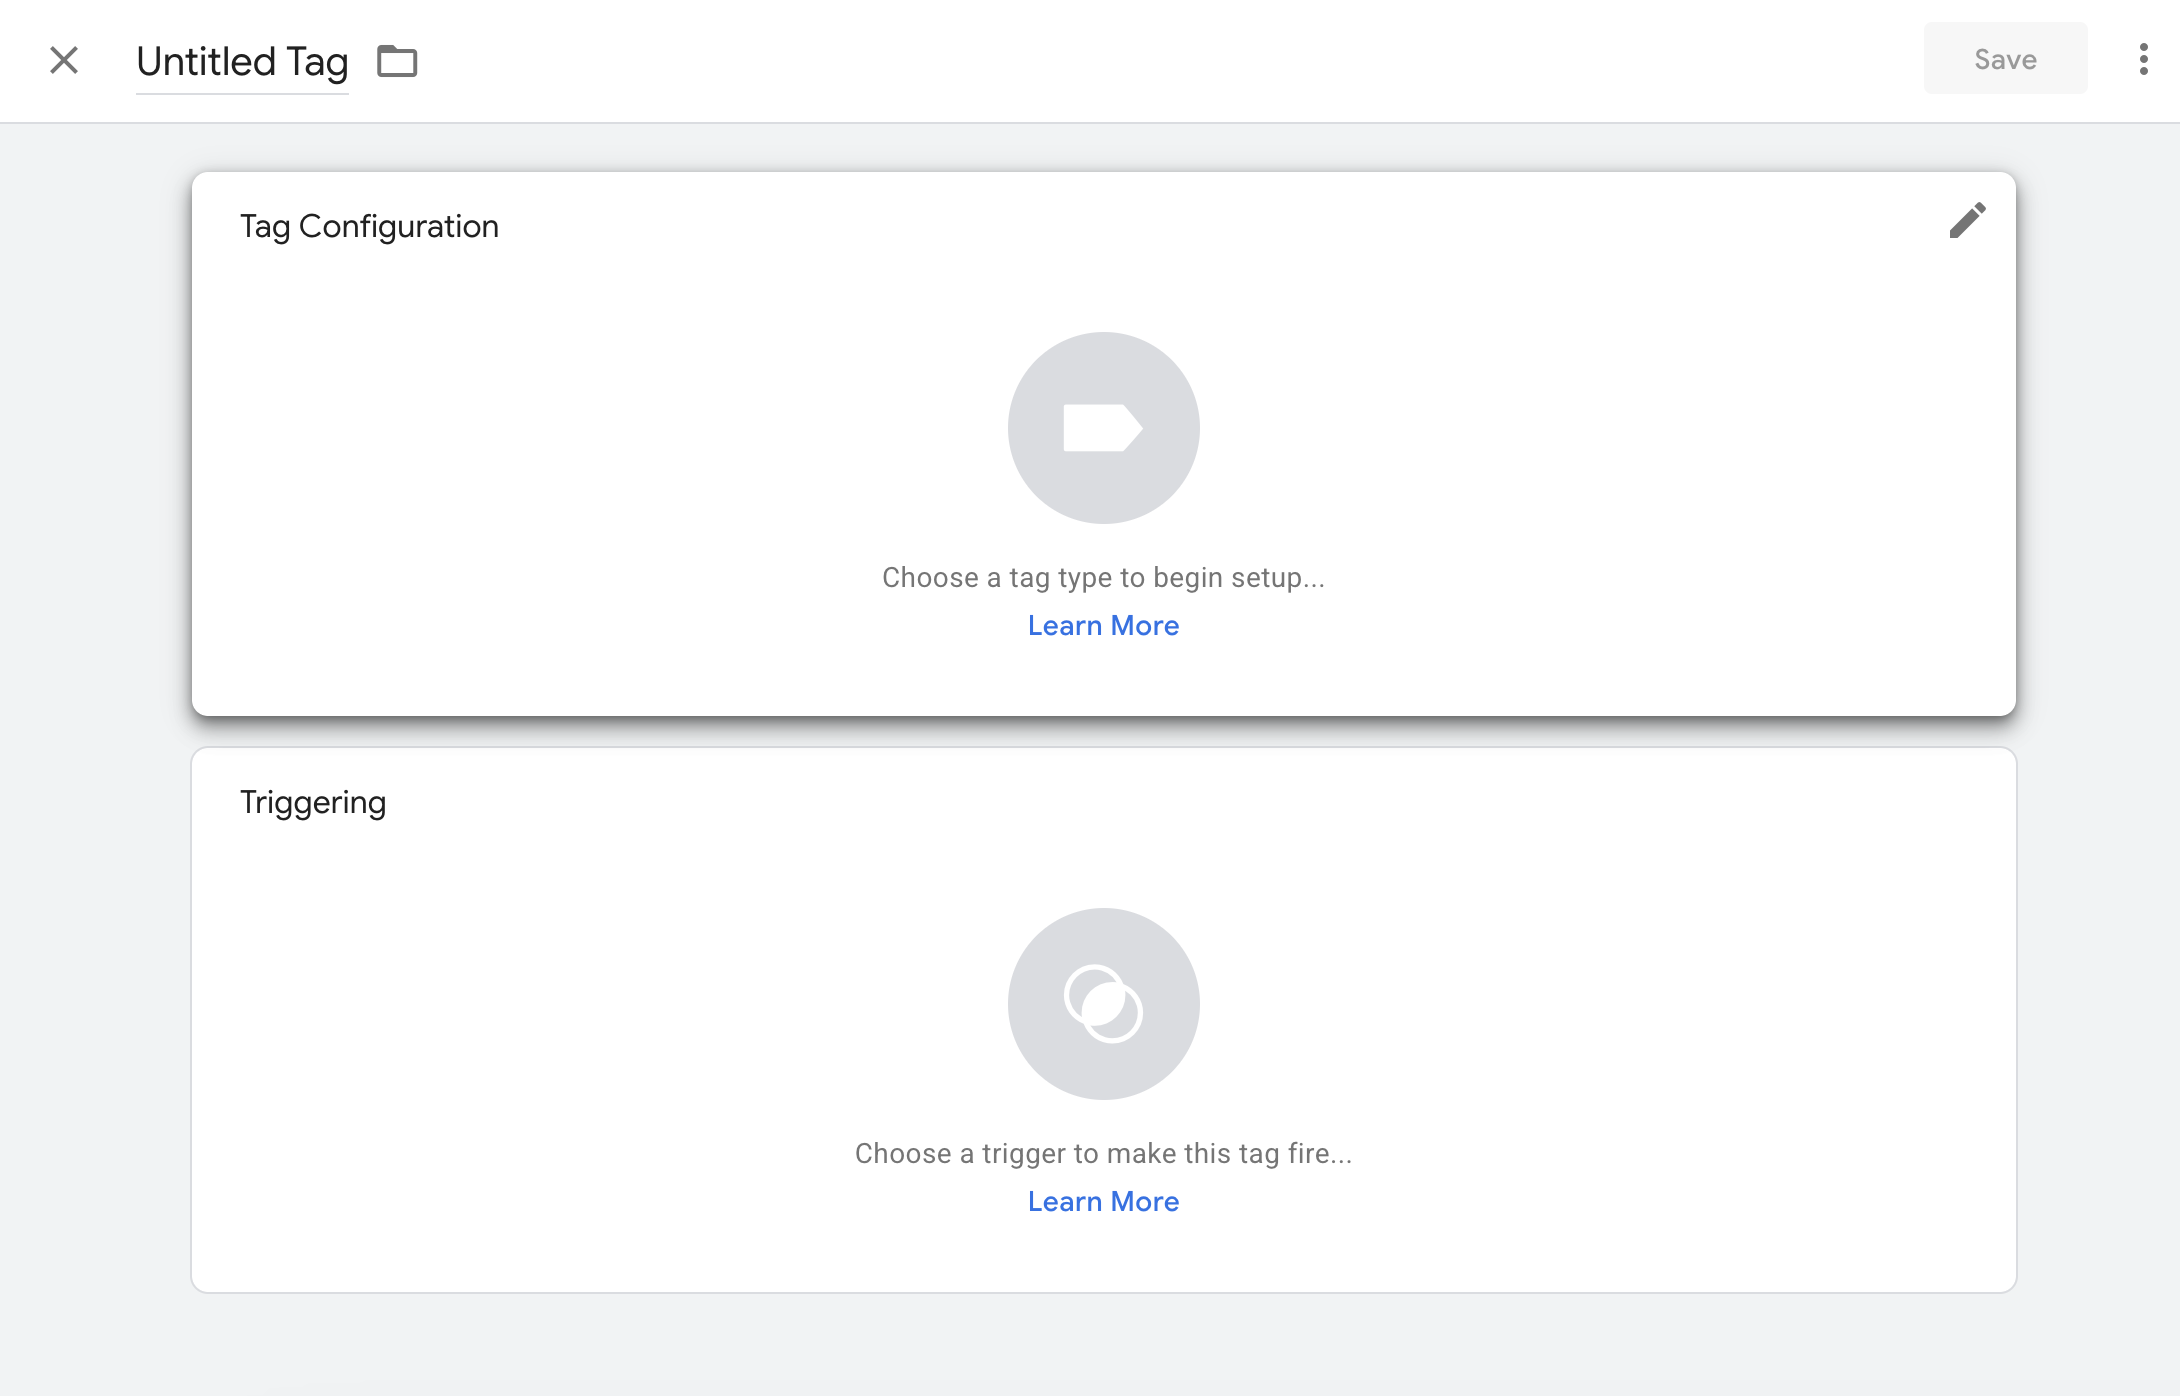
4. Embed Amio Web Chat to your webpage with GTM
- Go to your Google Tag Manager container and create a new tag.

-
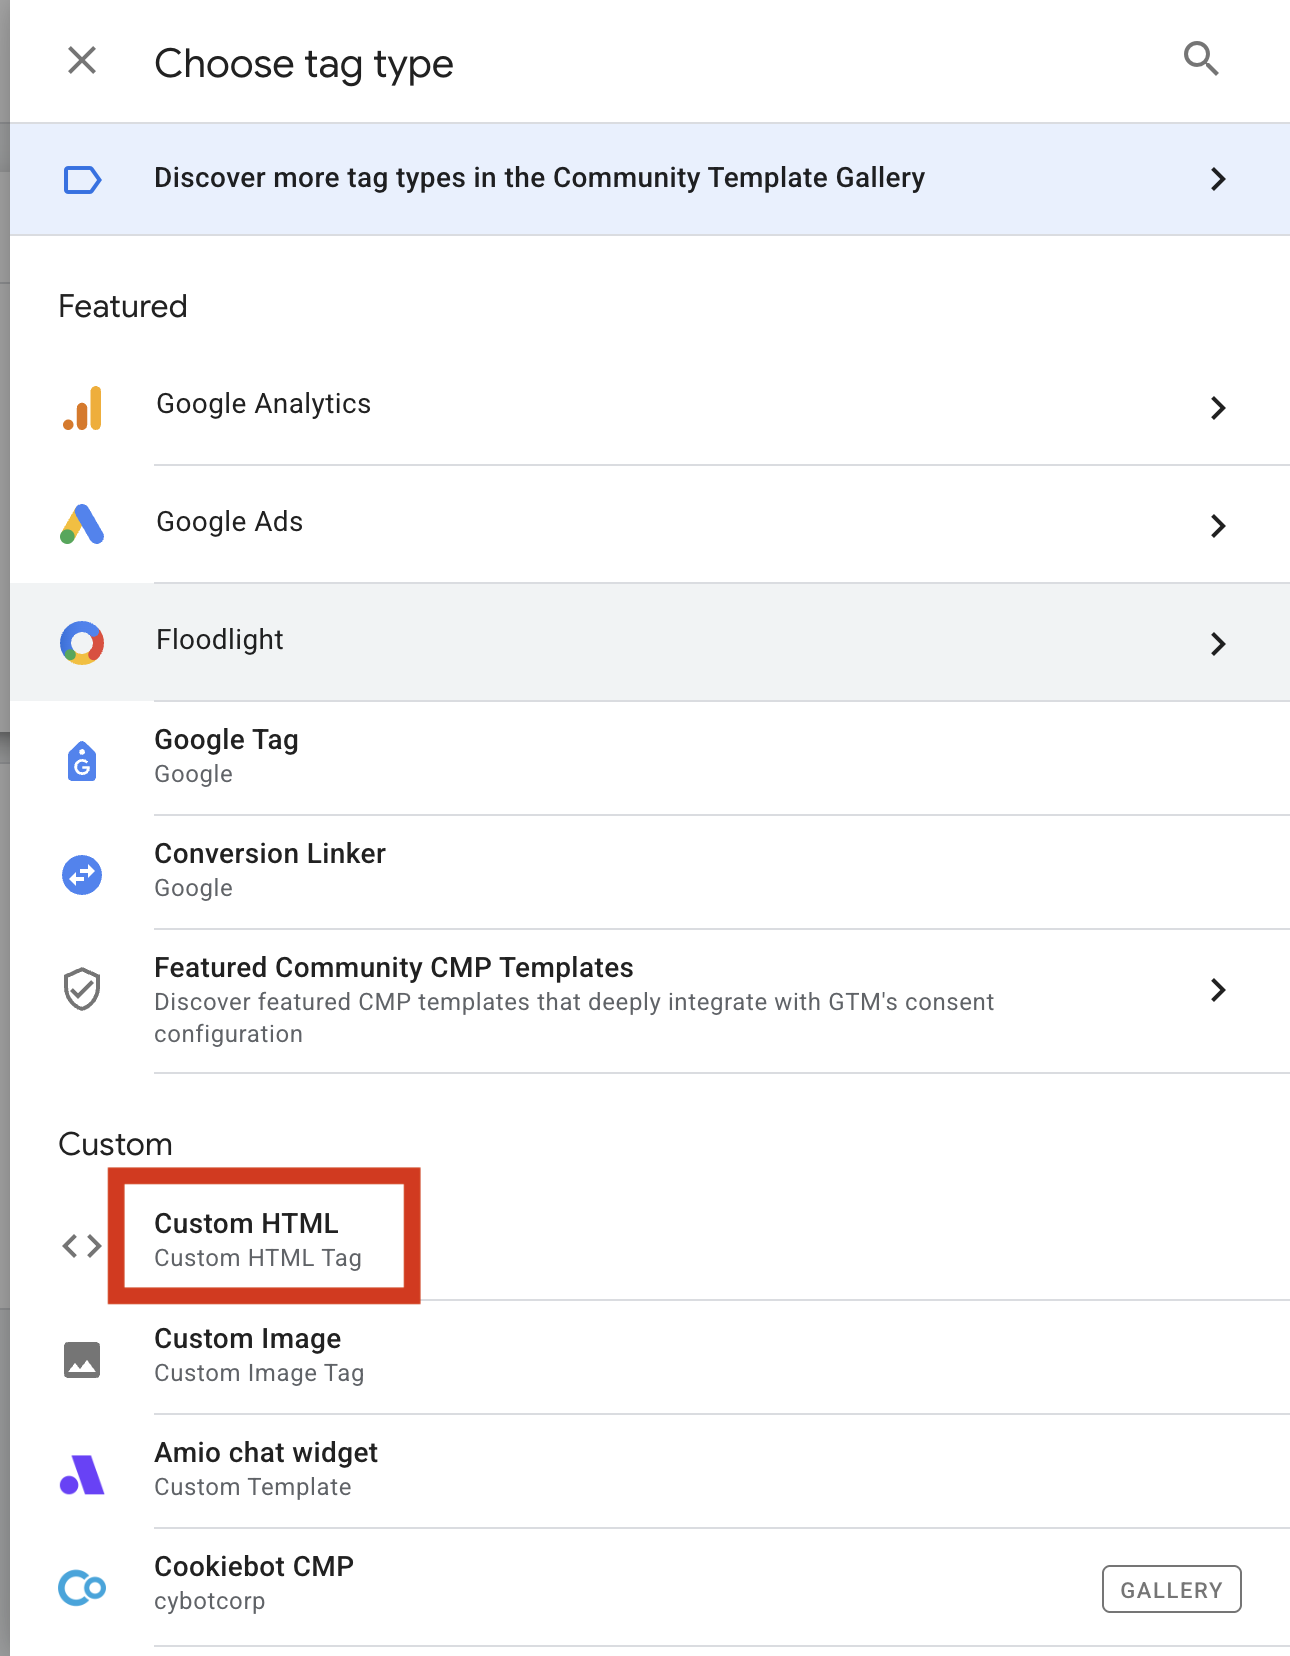
Go to Tag Configuration - Click -> Choose a tag
- Get the code in Amio app
- Choose Chat language for your chatbot
- Click "Deploy chat"

- Choose JavaScript code - and click "Copy"
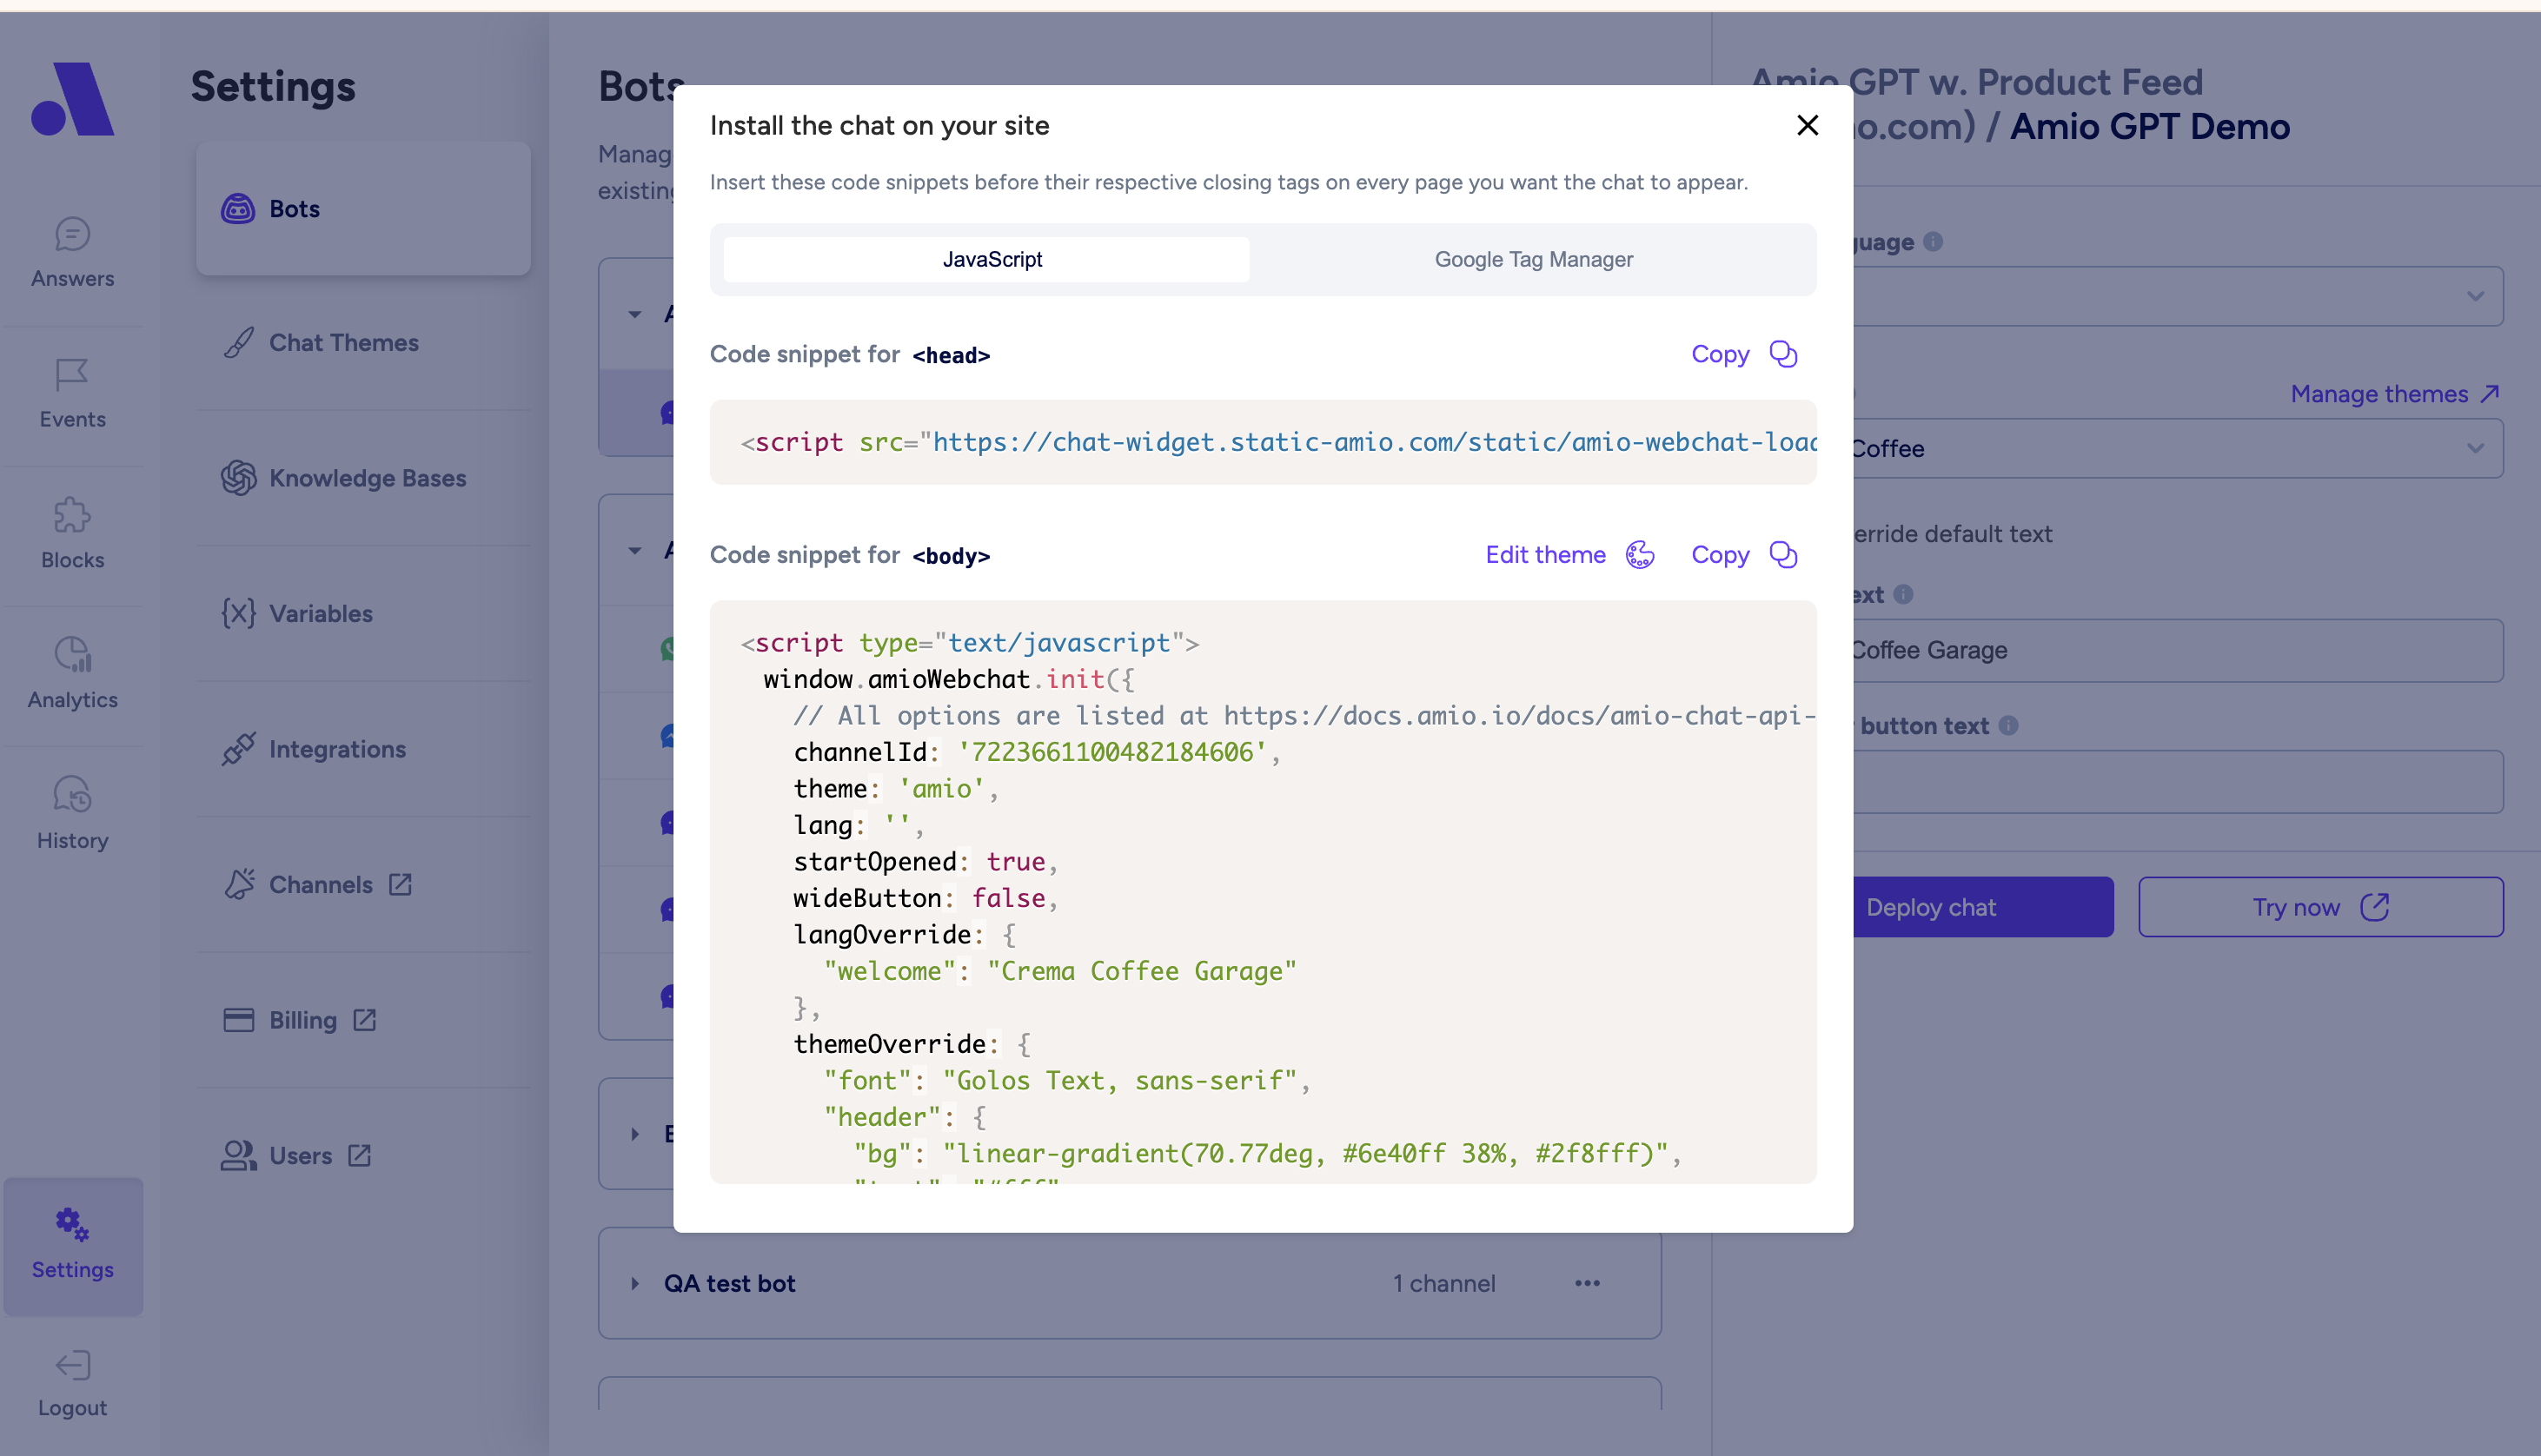
(Additional parameters - these should be given to you by your account manager.)
- Channel ID - ID of channel in Amio
- Logo URL - link to a logo displayed in the header of the chat
- Theme - the visual design of your chat
4.Add triggering - All Pages

- Save and submit!
Updated 4 months ago