
Tools
A tool is an API call the AI can decide to make while it writes a reply. Use one to check an order status, stock level or booking. You describe the tool and its inputs, the AI decides when to call it, and it uses the result in its reply. Tools are shared by all your bots.
Before you start
Section titled “Before you start”- You need the API URL, the HTTP method, and any headers or keys the API requires.
- Store keys and domains as variables so you do not paste secrets into each tool.
Set up a tool
Section titled “Set up a tool”- Open Tools in the admin and click Add.
- Under Configuration, keep the type HTTP request.
- Enter a Name with lowercase letters, digits and underscores, for example
get_order_status. The AI sees this name. - Write a Description that says when to call the tool, for example “Look up the delivery status of an order once the customer gives an order number.” Be specific. The AI uses this to tell tools apart.
- Under Parameters, click Add parameter for each value the AI should work out from the chat. Give each a Name (such as
orderId), a Type (string, number, integer, boolean, array or object), a description the AI reads (such as “The order number the customer gave, e.g. AB-10293”) and tick Req. if it is required. - Under Request, choose the Method (GET, POST, PUT, PATCH or DELETE) and enter the URL.
- Put parameters into the request with
${args.name}, for examplehttps://api.example.com/orders/${args.orderId}. Put per-bot values with${variable.name}, for example${variable.api_domain}. - Add Headers, Query params or a Body on the tabs below the URL. Headers and query values are entered as JSON.
- Set Give up after in milliseconds. The customer is waiting, so keep it short. The default is 10000 and the allowed range is 1000 to 60000.
- Under Response handling, tell the AI what to say for each result the API can return, including failures. Up to 8000 characters. For example: “If status is DELIVERED, give the delivery date. If the request fails, apologise and hand over to an agent.”
- Click Add tool.
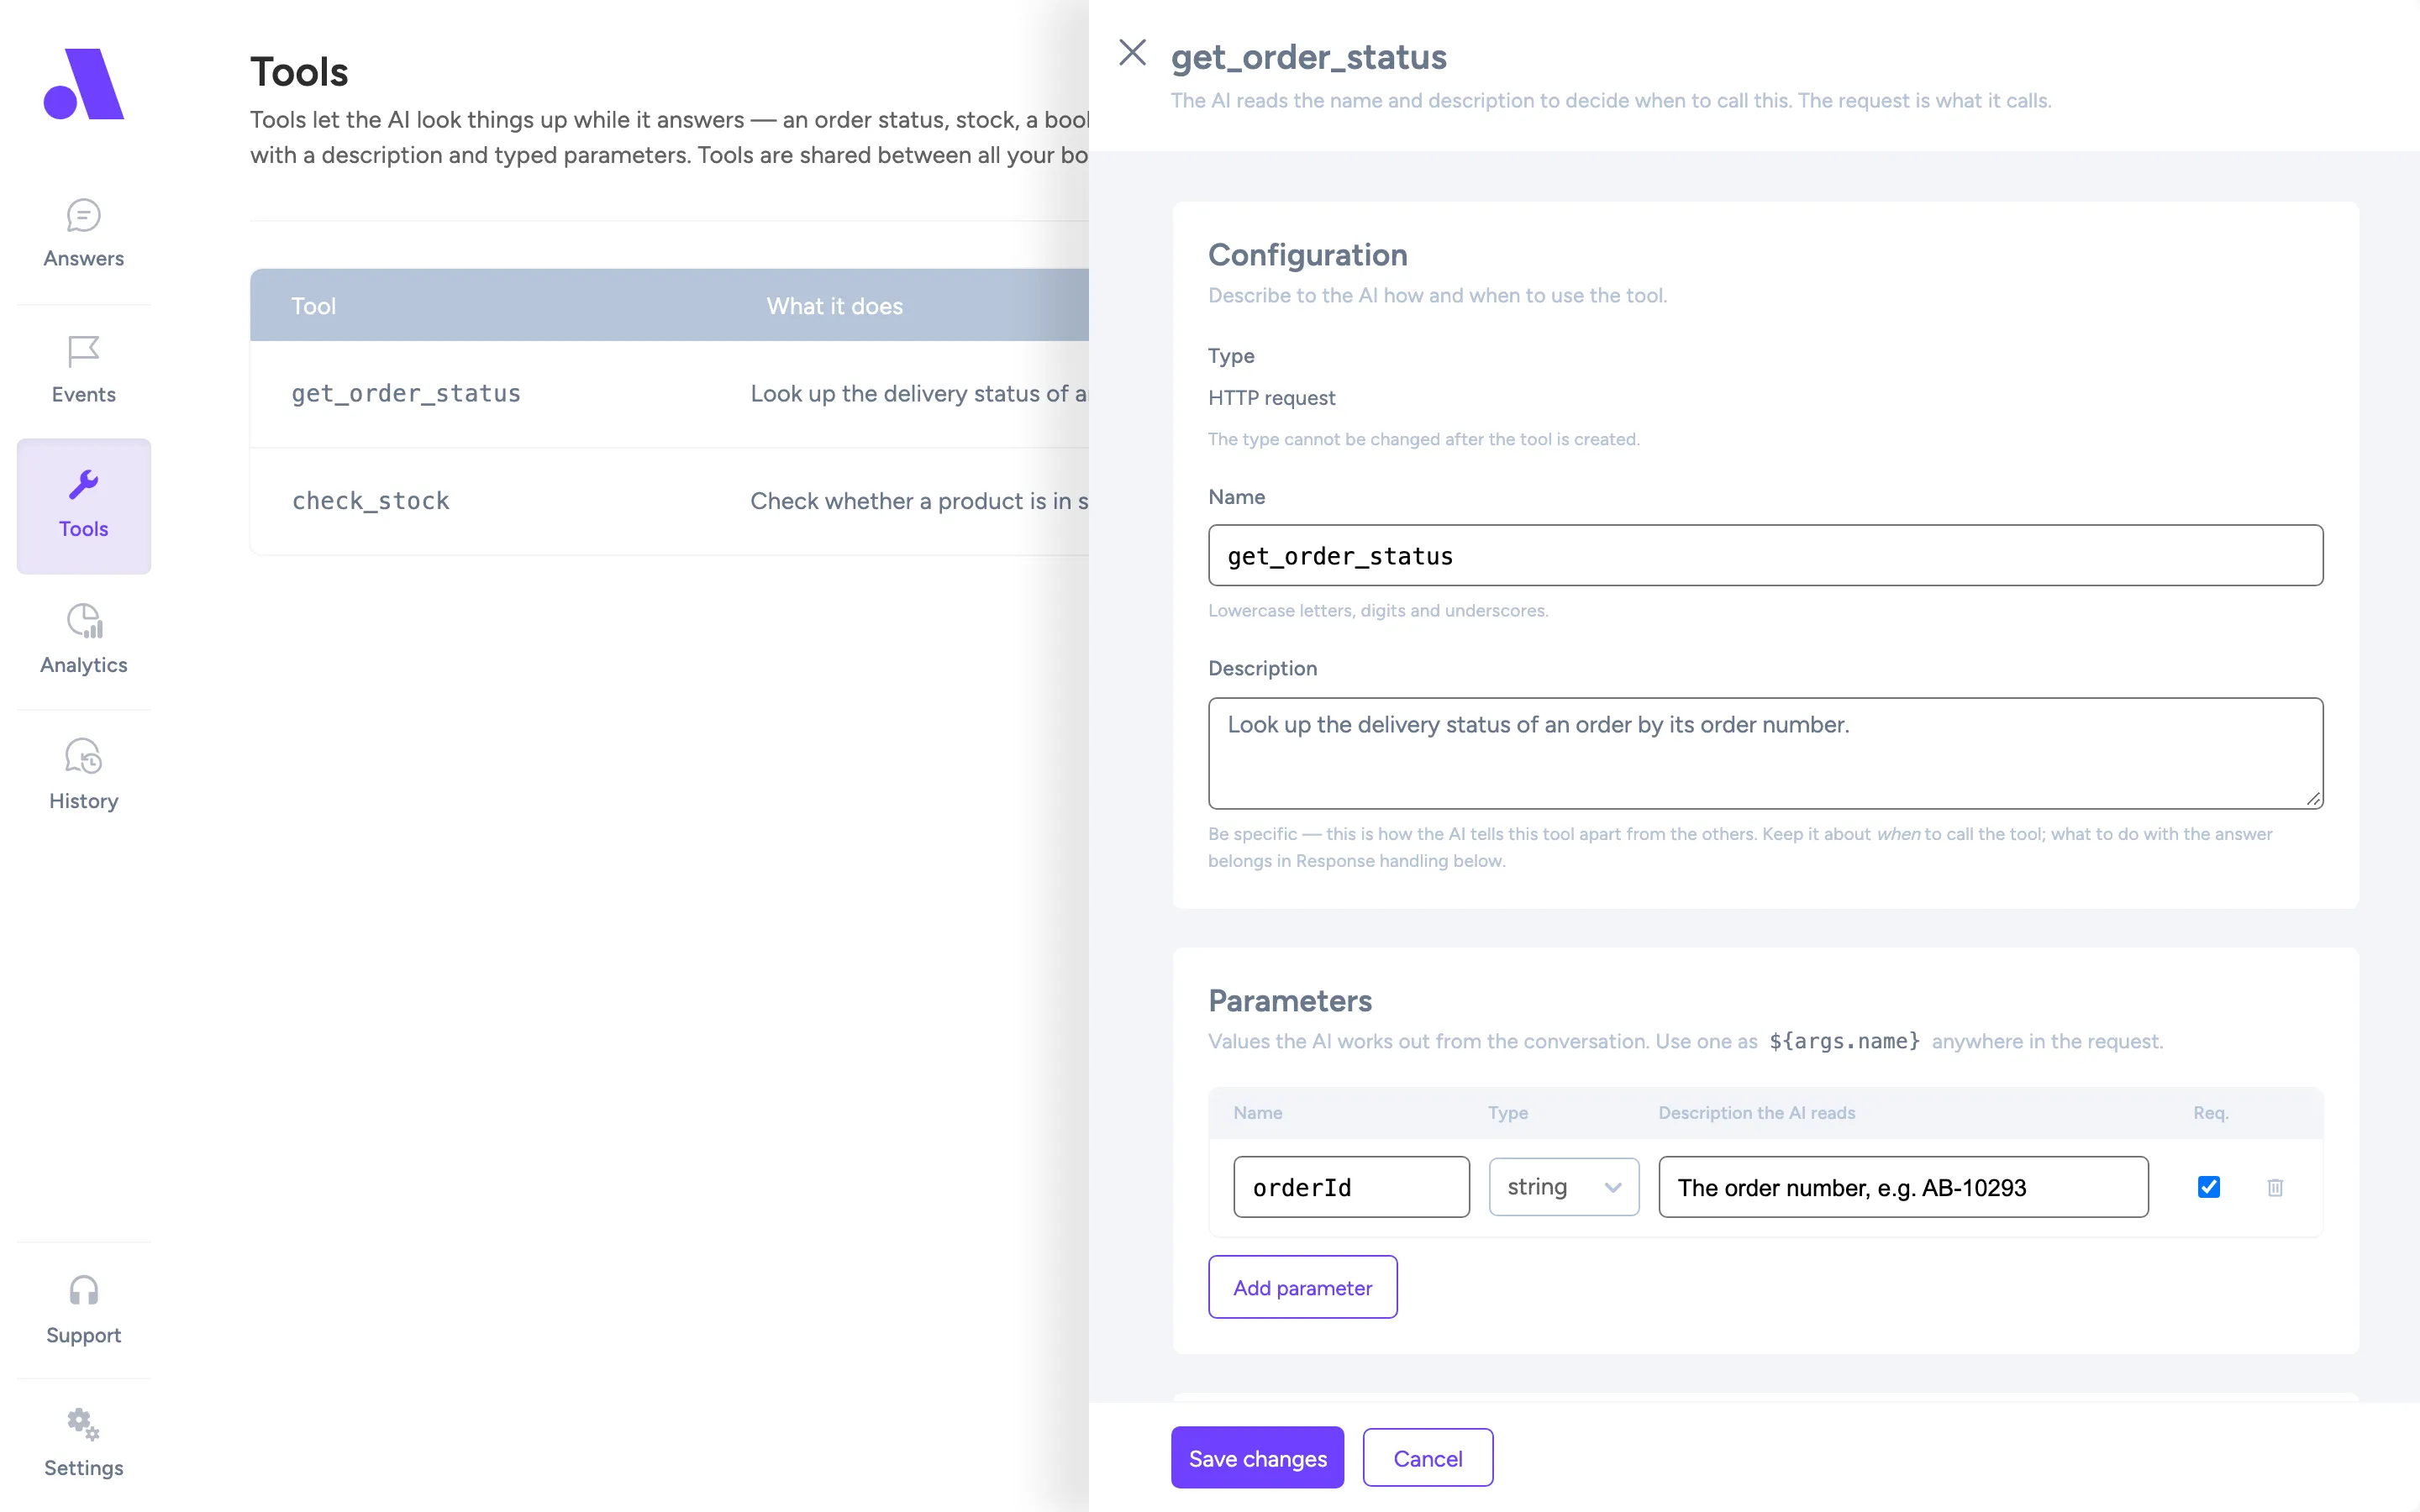
Every ${args.name} in the request needs a matching parameter, or saving is rejected.
Test it
Section titled “Test it”Open the saved tool. In the Try it section, pick the bot to Run as bot (this decides which values your variables take), fill in the parameters, and click Send request. You see the HTTP status, the time it took, the request that was sent and the raw response. This is the API’s response, not an AI reply. It runs the saved version, so save changes first.
Use it in an answer
Section titled “Use it in an answer”- Open an answer that has an AI answer step.
- In the Tools list, tick the tool. The AI only sees tools you tick.
- In the Instructions, say when the AI should use it, for example “Ask for the order number, then check the order status.”
- Test in the preview chat.
If the list says there are no tools, use the link to open Tools and create one.
MCP servers
Section titled “MCP servers”The tool type MCP server connects to an external server that offers its own set of tools. Enter its URL and headers, click Load tools, and tick the tools to offer to the AI. None ticked means none are offered. You cannot change a tool’s type after you create it, and MCP tools cannot be tested in Try it.
Edit, find usage, delete
Section titled “Edit, find usage, delete”The tool list has Edit tool, Where this tool is used (lists the answers, events and blocks) and Delete tool. You cannot delete a tool that an answer still uses. Untick it in those answers first.